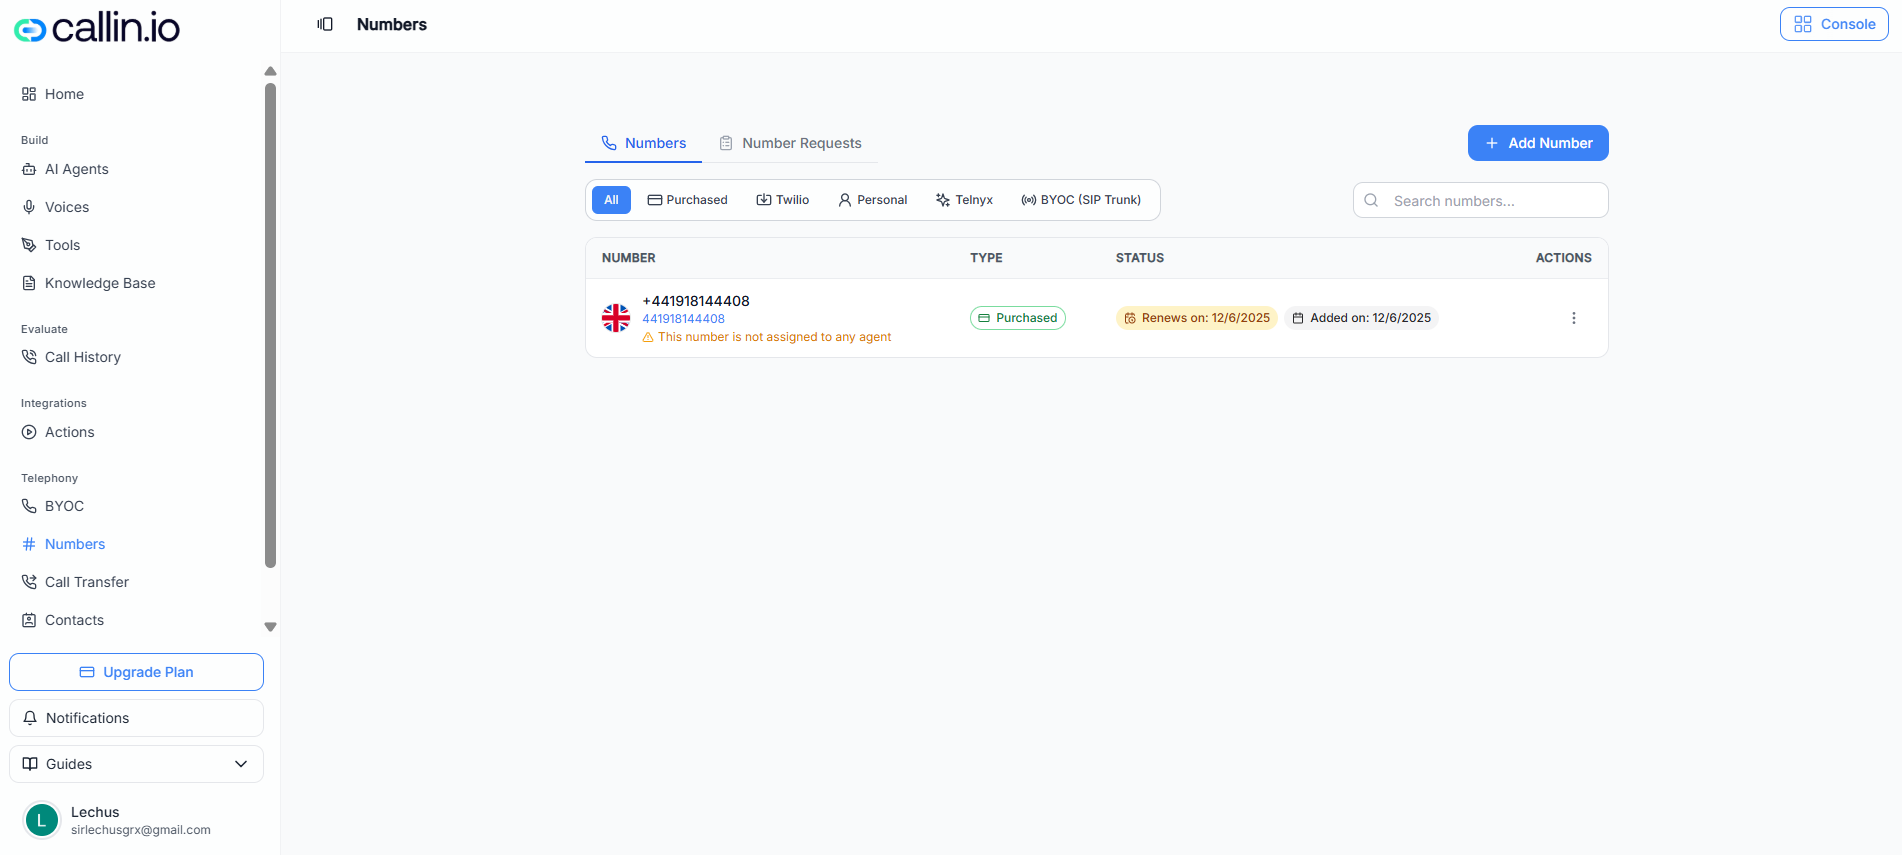
Screenshot: The Numbers page where you can filter by provider and click + Add Number to purchase or import numbers.
### What you can do in Numbers When you click **+ Add Number**, you’ll typically see these options (wording may vary slightly by account/plan): * **Purchase Number** (buy through Callin.io) * **Import from Twilio** * **Add Personal Number** * **Add Telnyx Number** (after Telnyx is connected) You’ll also usually see filters like **Purchased**, **Twilio**, **Personal**, **Telnyx**, and **BYOC (SIP Trunk)** to quickly find what you’re looking for. *** ### Option A: Purchase a number through Callin.io Buying numbers through Callin.io is the simplest way to get started. #### US & Canada: instant purchase For **United States** and **Canada**, the purchase flow is typically instant: 1. Go to [Open Numbers](https://app.callin.io/numbers). 2. Click **+ Add Number** → **Purchase Number**. 3. Choose the **Country**. 4. Choose a type: * **Local** * **Toll-Free** (if available) 5. (Optional) Use **Search by Area Code** (example: `415`). 6. Click **Search Numbers**. 7. Select a number from the list. 8. Click **Purchase Selected Number**. > **Important:** After purchase, the number should appear in your list. If you see a warning like “this number is not assigned to any agent,” you still need to assign it to an agent before using it. #### Other countries: request + documentation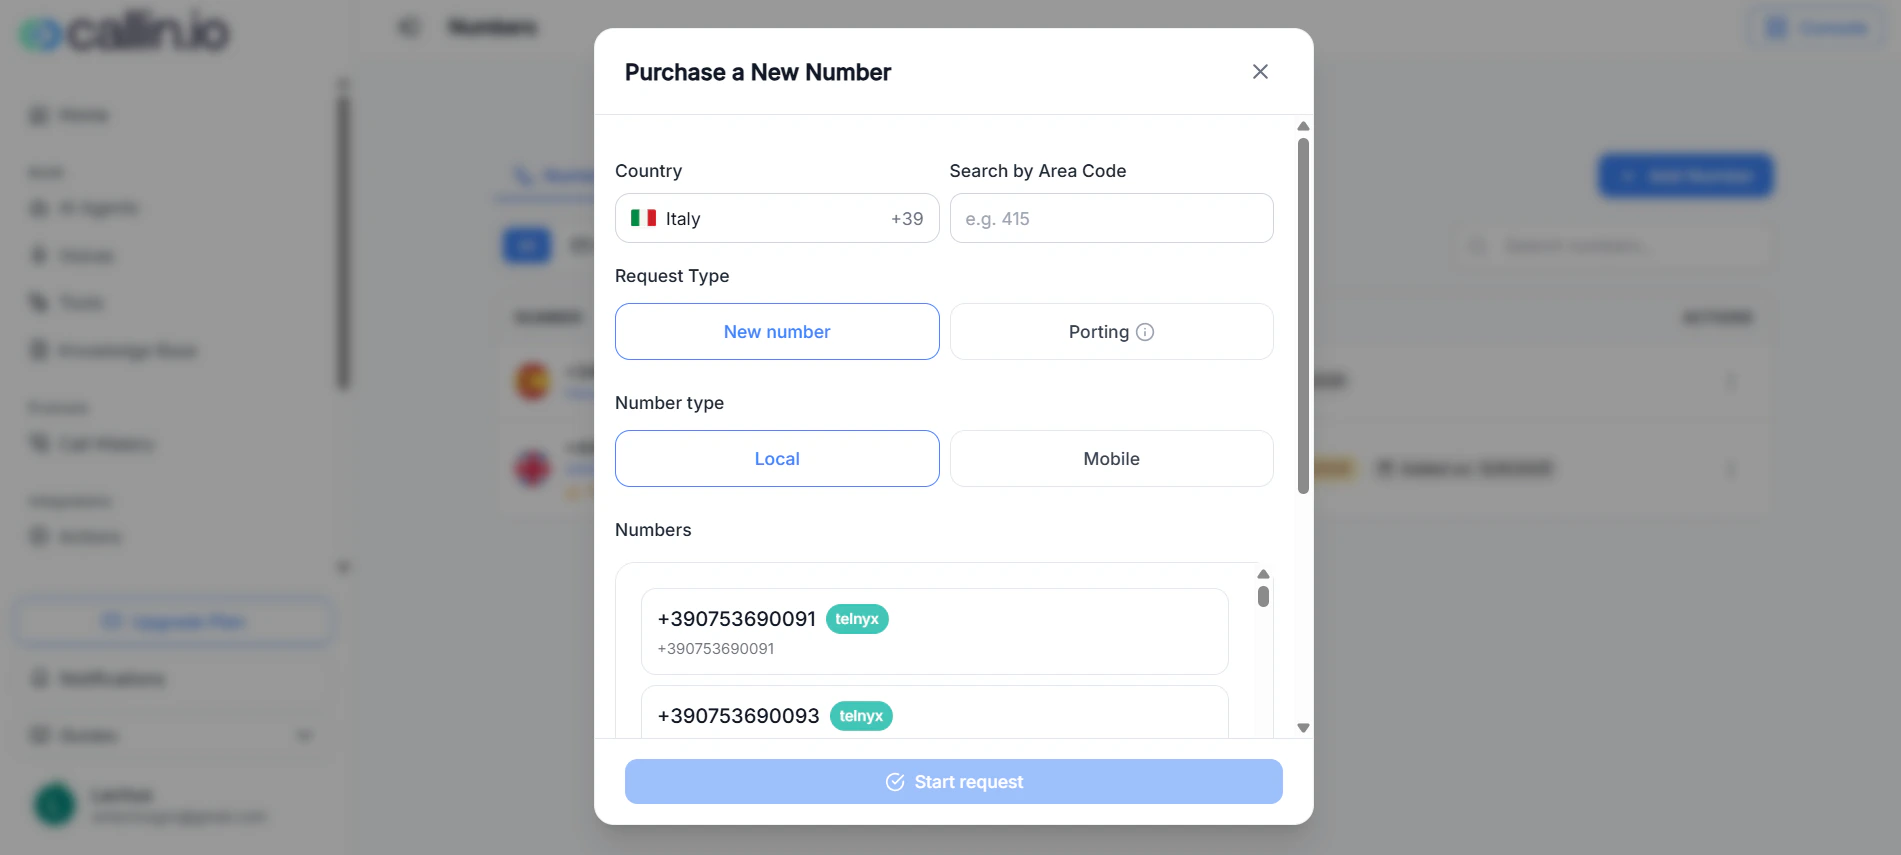
Captura: after you start the request, the platform loads the country-specific fields and documents you must complete before payment and review.
For many **non-US/Canada** countries, purchasing is a **request-based** flow rather than an instant checkout. * You select the country and number type (for example **Local** or **Mobile**). * You may see **Request Type** options such as **New number** and **Porting**. * You choose one of the available numbers and click **Start request**. * The platform then loads the **country-specific** information and documentation requirements. * You must complete the required fields, upload documents, and save each item. * You submit the request, pay any required fees, and then the request is reviewed by an operator. You can typically track these under a tab like **Number Requests**. This part of the process is important because the requirements are not always the same. They can change depending on the **country**, the **number type**, and whether the request is being made by an **individual**, a **sole proprietorship**, or a **company**. ##### How the documentation step works After you click **Start request**, the form may show a combination of: * Text fields you must complete manually * Upload fields for supporting documents * A **Save** button for each individual requirement * A **Pending** status until that specific item is correctly saved or uploaded This means the request is usually completed **piece by piece**, not all at once. If a field or upload still shows **Pending**, that requirement is normally not complete yet. In many request-based countries, the form can ask for details such as: * **Identity document type** * **Identity document number** * **Date of birth** * **Place of birth** * **Identity document issuer** * **Identity document expiration date** * **Local address in the same country** * **Personal Tax Code** * **VAT number** * **Company Tax Code** * **IT Customer Type** * **Proof of Address** * **Passport/ID copy** * **Company Registration certificate** Some labels may also clarify who must provide each item, for example: * **For legal entities only** * **For legal entities and sole proprietorships only** * **For natural persons and sole proprietorships only** So, even if two customers request numbers in the same country, the required documentation may differ depending on the business type and the exact number category. > **Tip:** In the request form, some fields have their own **Save** button. Entering a value is not always enough by itself. The item may continue to show **Pending** until you click **Save** successfully. ##### Common document requirements (examples) Exact requirements depend on the country and number type, but you may be asked for items like: | Requirement | What it means | Example | | -------------------------------------------- | --------------------------------------------------------------------------------------------------- | ---------------------------------------------------------------------------- | | Address matching the DID area code | You may need an address in the same city, region, or coverage area as the number you are requesting | “Via Roma 22, Milan” for a Milan local number | | National ID / Tax ID | Personal or business identification used to validate the requester | Passport number, national ID, tax code, VAT number | | Contact info | A reachable person or company contact for the request | “Luca Bianchi, +39 345 000 1111” | | Proof of address (upload) | A document showing the address you entered in the request | Utility bill, bank statement, rental contract, or official government letter | | Passport/ID copy (upload) | Identity verification for an individual or company representative | Passport scan or front/back ID copy | | Business certificate (upload) | Proof that the company is legally registered | Certificate of incorporation, business registration extract | | Company Tax Code / VAT number | Business tax information for company-based requests | VAT registration number or company tax number | | Date and place of birth | Personal identification details required in some countries | “14 March 1988, Naples” | | Identity document issuer and expiration date | Information about the issuing authority and validity of the ID document | “Issued by Comune di Torino, expires 08/2028” | ##### Proof of address: what usually causes problems The **proof of address** document is one of the most common reasons a request is delayed. In many countries, the uploaded proof of address must meet all of these conditions: * It must clearly show the **same name** used in the request, or the company name if the request is for a business * It must clearly show the **same address** entered in the form * It must be **recent** * It must be complete and readable * It must not be cropped in a way that hides important details A very important rule is that the bill or address document often must be **no more than 3 months old** at the time of submission. That usually means you should upload a recent document such as: * A utility bill dated within the last 3 months * A bank statement dated within the last 3 months * An official government or tax letter dated within the last 3 months Older documents may be rejected even if the address itself is correct. > **Important:** When you upload a bill or bank statement as proof of address, make sure it is **less than 3 months old**. If the document is older, the request may remain pending or be rejected during review. ##### How to prepare documents before uploading To avoid delays, check each document before you upload it. A good document should be: * **Clear and readable** * **Complete**, not cut off at the edges * **Consistent** with the data entered in the form * **Current**, especially for address documents * **Relevant** to the requester type, whether individual or company For example, if the request is for a company, the reviewer may expect the company name, company number, tax details, and registration documents to match each other. If the request is for an individual, the reviewer may check that the personal name, ID document, and proof of address all match. Common issues that can slow approval include: * The address in the form does not match the uploaded document * The uploaded bill is older than 3 months * The passport or ID copy is blurry * A company request is submitted with personal documents only * A field is filled in, but the user did not click **Save** * A document was uploaded, but its status still shows **Pending** > **Common mistake:** Uploading the correct file is not always enough. After each upload or text entry, check that the requirement no longer shows **Pending**. ##### Fees + review Some countries show a **fee payment** step after the documentation is completed. This may include: * A **one-time activation fee** * The **monthly recurring cost** for the number The request generally moves forward only after the required documents are uploaded and the payment step is completed. After you submit and pay: * You’ll receive a **Request ID** * The request is reviewed by an operator * Once approved, the number appears in your Numbers list The review is manual in many cases, which is why approval is not always immediate. > **Important:** Approval timing can vary by country, provider rules, and document quality. If you need the number for an upcoming launch or campaign, submit the request as early as possible and use recent, clearly readable documents. *** ### Option B: Import numbers from Twilio If you already own numbers in Twilio, you can import them into Callin.io: 1. Go to [Open Numbers](https://app.callin.io/numbers). 2. Click **+ Add Number** → **Import from Twilio**. 3. Enter your **Twilio Account SID** and **Twilio Auth Token**. 4. Click **Search Twilio Numbers** and select the numbers to import. 5. Assign imported numbers to an AI agent when you’re ready to use them. > **Common mistake:** Copying the wrong Twilio credentials (for example, using a test credential instead of live). If no numbers appear, re-check your Twilio project and permissions. *** ### Option C: Add a Personal Number (outbound-only) A **Personal Number** is useful when you want to place outbound calls from your own phone number—but it cannot receive inbound calls inside Callin.io.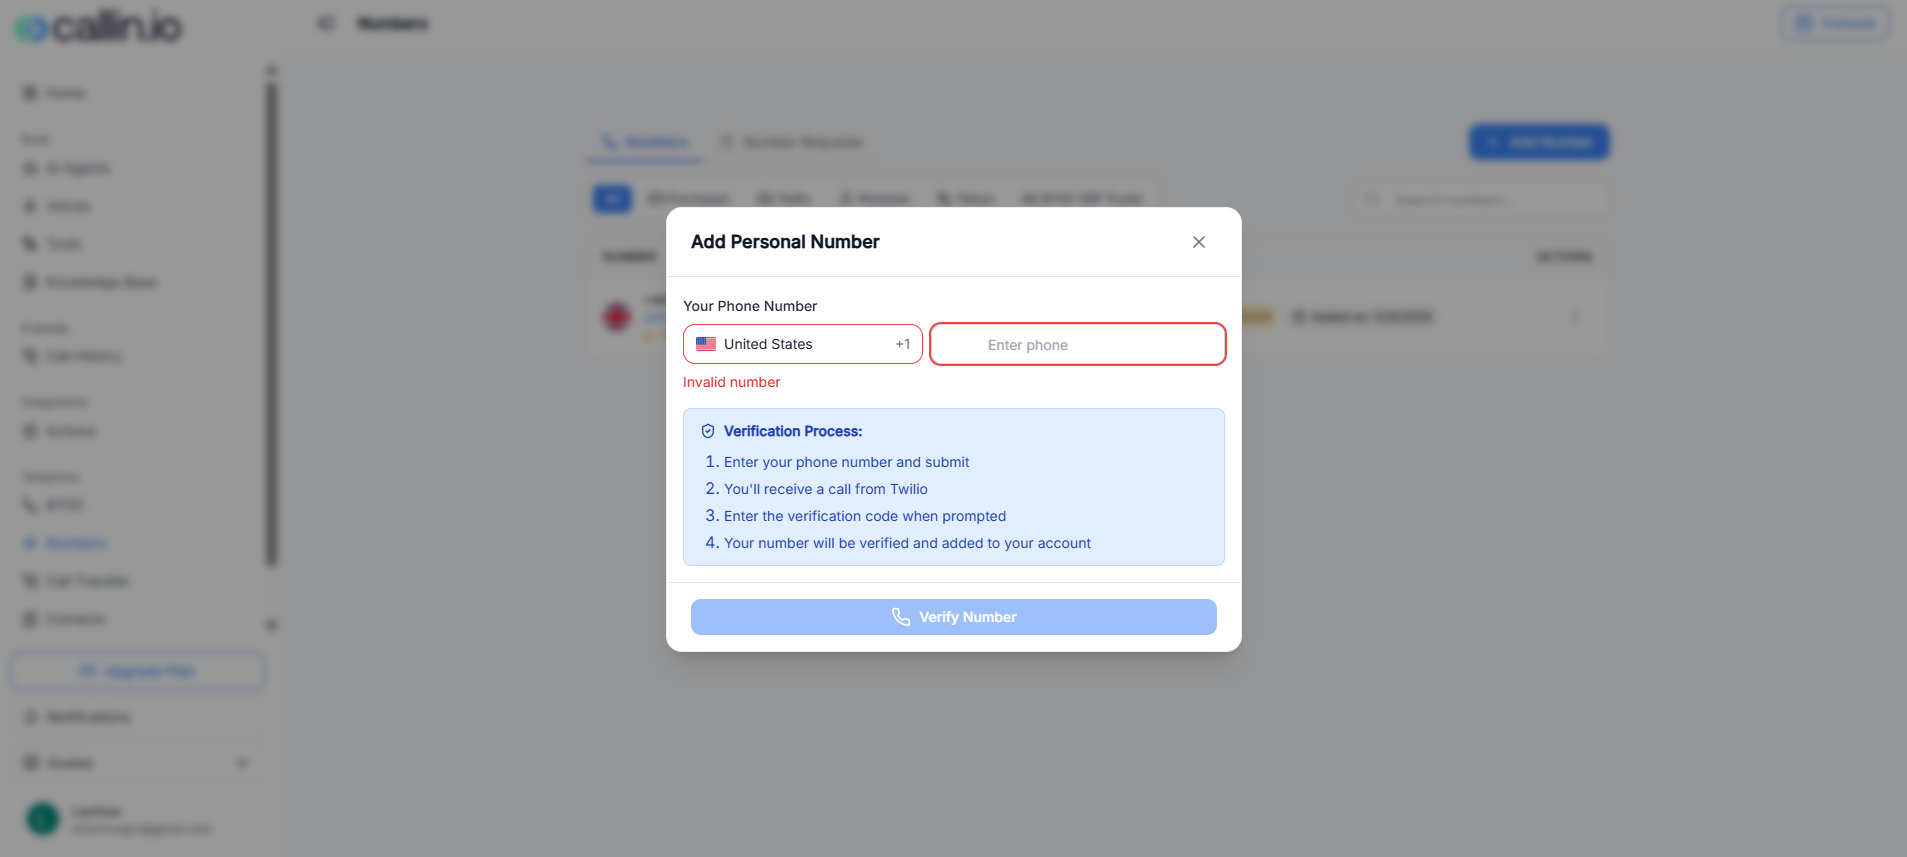
Screenshot: The Add Personal Number modal with phone input and the verification process (you receive a verification call and enter the code).
#### Verify your personal number 1. Go to [Open Numbers](https://app.callin.io/numbers). 2. Click **+ Add Number** → **Add Personal Number**. 3. Select your country code and enter your phone number. 4. Click **Verify Number**. 5. You’ll receive a **verification call**. 6. Enter the verification code when prompted. 7. After verification, the number is added to your account. > **Important:** Personal numbers are **outbound-only**. If you need inbound calls, use a purchased/imported number or BYOC. *** ### Option D: Add/Import Telnyx numbers If your Telnyx account is connected (via BYOC), you can import active Telnyx numbers into Callin.io: 1. Go to [Open Numbers](https://app.callin.io/numbers). 2. Click **+ Add Number** → **Add Telnyx Number**. 3. Select the Telnyx numbers you want to add/import. 4. Confirm, then assign them to agents as needed. *** ### Assign numbers to agents (so they can be used) Buying or importing a number is only step one—your agent still needs to use it. On the Numbers list, if you see a warning like “not assigned to any agent,” assign the number to the right AI agent before going live. > **Tip:** Keep one “test” number separate from production while you’re iterating on prompts and call flows. *** ## BYOC (SIP Trunk) **BYOC** means **Bring Your Own Carrier**. Instead of buying numbers through Callin.io, you connect your own telephony provider using a SIP trunk. Typical reasons to use BYOC: * You already have a carrier contract (enterprise telephony) * You need custom routing, SBC control, or compliance constraints * You want to avoid Callin-managed telephony rules by using your own provider Go here to set it up: [Open BYOC](https://app.callin.io/byoc)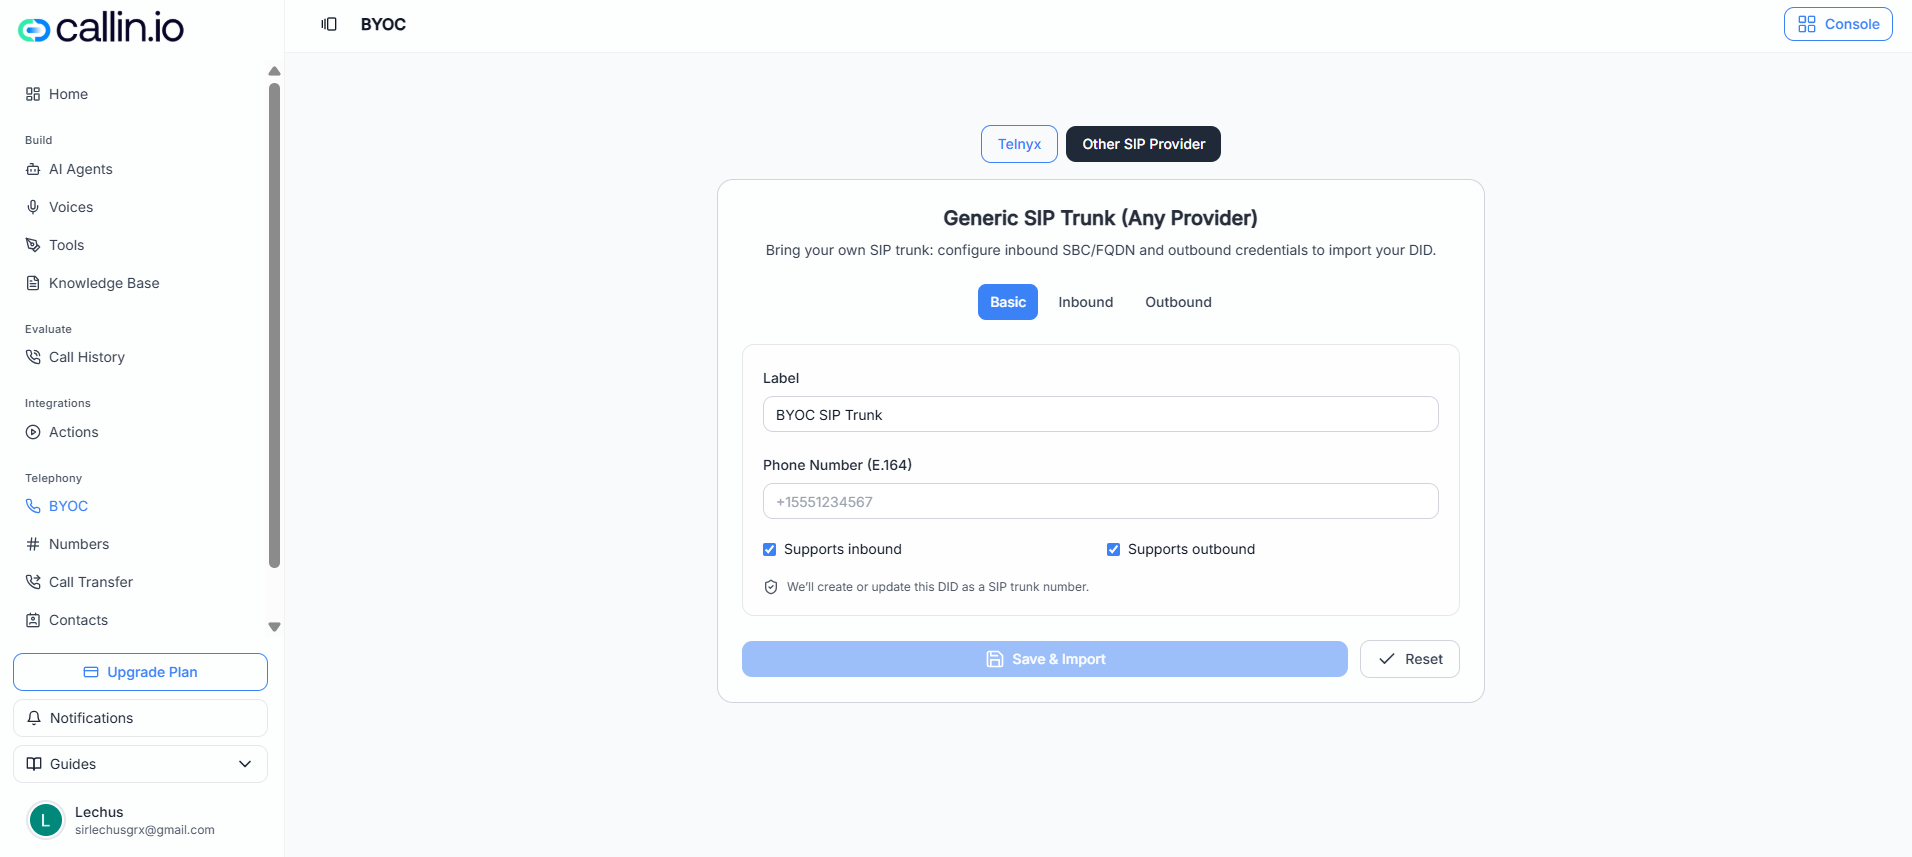
Screenshot: BYOC setup where you can connect Telnyx and synchronize numbers into Callin.io.
### What is a SIP Trunk (simple explanation) A **SIP trunk** is a connection between a phone carrier and your calling system. Think of it like a “phone line over the internet” that can handle inbound/outbound calls—often used by businesses. *** ### Option 1: Connect Telnyx If you use **Telnyx**, Callin.io can guide the setup with an API key: 1. Go to [Open BYOC](https://app.callin.io/byoc). 2. Select the **Telnyx** tab. 3. Paste your **Telnyx API Key**. 4. Click **Start**. During setup, you’ll typically see steps like: * Saving the Telnyx API key * Fetching active Telnyx numbers (DIDs) * Storing numbers in your Callin.io account * Provisioning the SIP trunk (inbound + outbound) * Creating provider phone numbers Once it completes, your Telnyx numbers should appear under **Numbers**. > **Important:** If your Telnyx key doesn’t have permission to read numbers/DIDs, Callin.io won’t be able to fetch them. *** ### Option 2: Connect another SIP provider (Generic SIP Trunk) If your provider is not Telnyx, use the **Other SIP Provider** tab. You’ll typically configure three areas: **Basic**, **Inbound**, and **Outbound**. #### Basic * **Label**: A friendly name (example: “HQ SIP Trunk”) * **Phone Number (E.164)**: Full international format (example: `+15551234567`) * You may also see toggles like **Supports inbound** and **Supports outbound** #### Inbound Inbound calls go from the carrier to your system. * **Inbound SBC / FQDN**: Your SIP address (example: `sip.example.com:5061`) * **Transport**: Often **TLS** or **UDP** * **Media encryption**: Enable if your provider supports it > **Tip:** Inbound often does **not** require credentials. Many carriers authenticate inbound calls by IP allowlists or trunk configuration. #### Outbound Outbound calls go from Callin.io to your carrier. * **Outbound SBC / FQDN**: Your provider’s SIP server * **Transport** and **Media encryption** * **Username** and **Password**: Your SIP credentials * **Allowed countries (outbound)**: Often **Worldwide** or a **Custom list** When finished, click **Save & Import**. > **Common mistake:** Using the wrong SBC/FQDN or credentials. If outbound calls fail, re-check your SIP username/password and whether your provider requires a specific port or transport. *** ## Minutes and billing (what to expect) Billing can have two parts: **Callin usage** and **telephony carrier charges**. What you see depends on how you connect numbers. ### Callin compute minutes **Compute minutes** represent the time your AI agent is active (listening, processing, responding). This is the core usage metric for AI calling. ### Callin-managed telephony: important billing notice (first-minute billing) When you place calls using **Callin-managed telephony** (for example, numbers purchased through Callin.io and routed through Callin’s carrier), you may see a **first-minute billing** rule: * Minimum charge is **1 minute** * After the first minute, billing typically follows the actual call duration * This rule typically **does not apply** to: * **Browser test calls** * **Imported own numbering** (Telnyx or Twilio imports) * **External SIP trunk (BYOC)** > **Important:** The exact billing behavior can vary based on your setup and provider routing. If you want to avoid Callin-managed telephony rules, import your own numbers or use BYOC. ### Personal number billing reminder Personal numbers are **outbound-only**, and calls made using a personal number can still fall under Callin-managed telephony rules depending on how your account routes calls. *** ## Troubleshooting ### “I can’t make calls” * Check that you have at least **one active number** * Make sure the number is **assigned to an agent** * If using BYOC, confirm your SIP trunk settings are correct (SBC/FQDN, transport, credentials) ### “My personal number isn’t receiving inbound calls” * That’s expected: **Personal Numbers are outbound-only** * Use a purchased/imported number or BYOC for inbound calling ### “My imported numbers don’t show up” * Re-check credentials (Twilio SID/Auth Token, Telnyx API Key) * Confirm the numbers are active in the provider account * Try again and verify you’re using the correct project/sub-account in the provider *** ## Final note If you want the fastest setup, start with **a US/Canada number purchased in Callin.io**. If you need advanced routing or already have a carrier, connect **BYOC**. Once your number is added and assigned, your AI agents can place and receive real phone calls at scale.