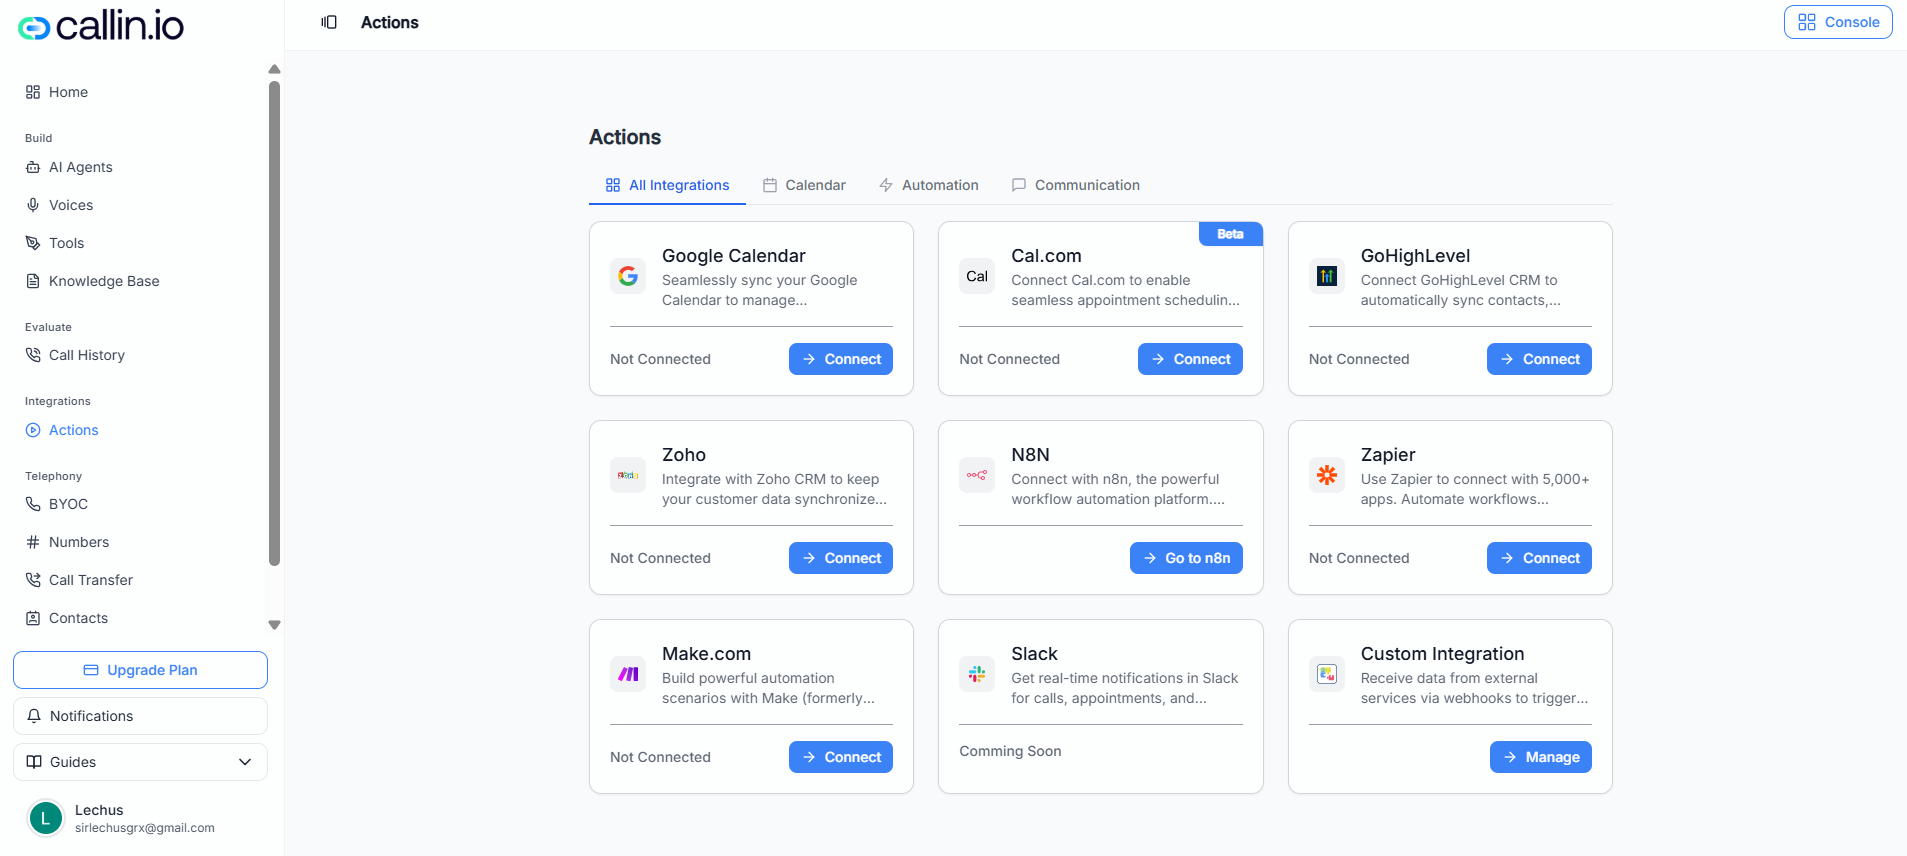
Screenshot: This is the Google Calendar integration area where you connect your account, choose a calendar, and manage event templates.
> **Tip:** If your UI looks slightly different, that’s normal—some elements can vary by account or plan. ## Step 1: Connect your Google Account 1. On the Google Calendar integration page, click **Connect Google Account**. 2. A Google sign-in window opens. Choose the Google account you want to use for bookings. 3. Approve the permissions screen so Callin.io can create events and check availability. Once connected, you’ll typically see: * Your Google account displayed in the left panel * A list of calendars you can select * A **Disconnect Account** option (use it if you connected the wrong account) > **Important:** Use a calendar that represents your real availability. If your Google Calendar is always “busy” (or always “free”), the booking experience won’t match reality. ## Step 2: Choose the calendar where appointments should be created In the left panel, select the calendar you want bookings to go into. Examples: * A service business might use a calendar named “Appointments” * A sales team might use “Discovery Calls” * A clinic might use “Consultations” Why this selection matters: * Your template is built **for a specific calendar** * The agent will book into the calendar/template you assign later > **Tip:** If you have multiple calendars (for different teams or services), you can create different templates per calendar and assign the right one to each AI Agent. ## Step 3: Create an Event Template (this is where scheduling rules live) Before attaching scheduling to an AI Agent, you must create at least one **Event Template**. This template defines: * How long appointments are * How reminders work * Whether overlapping bookings are allowed * How conflicts are handled * Which days are available for bookings (Working Hours) To create one: 1. In the **Event Templates** section, click **Create Event Template**. 2. Fill out the fields (details below). 3. Click **Save**.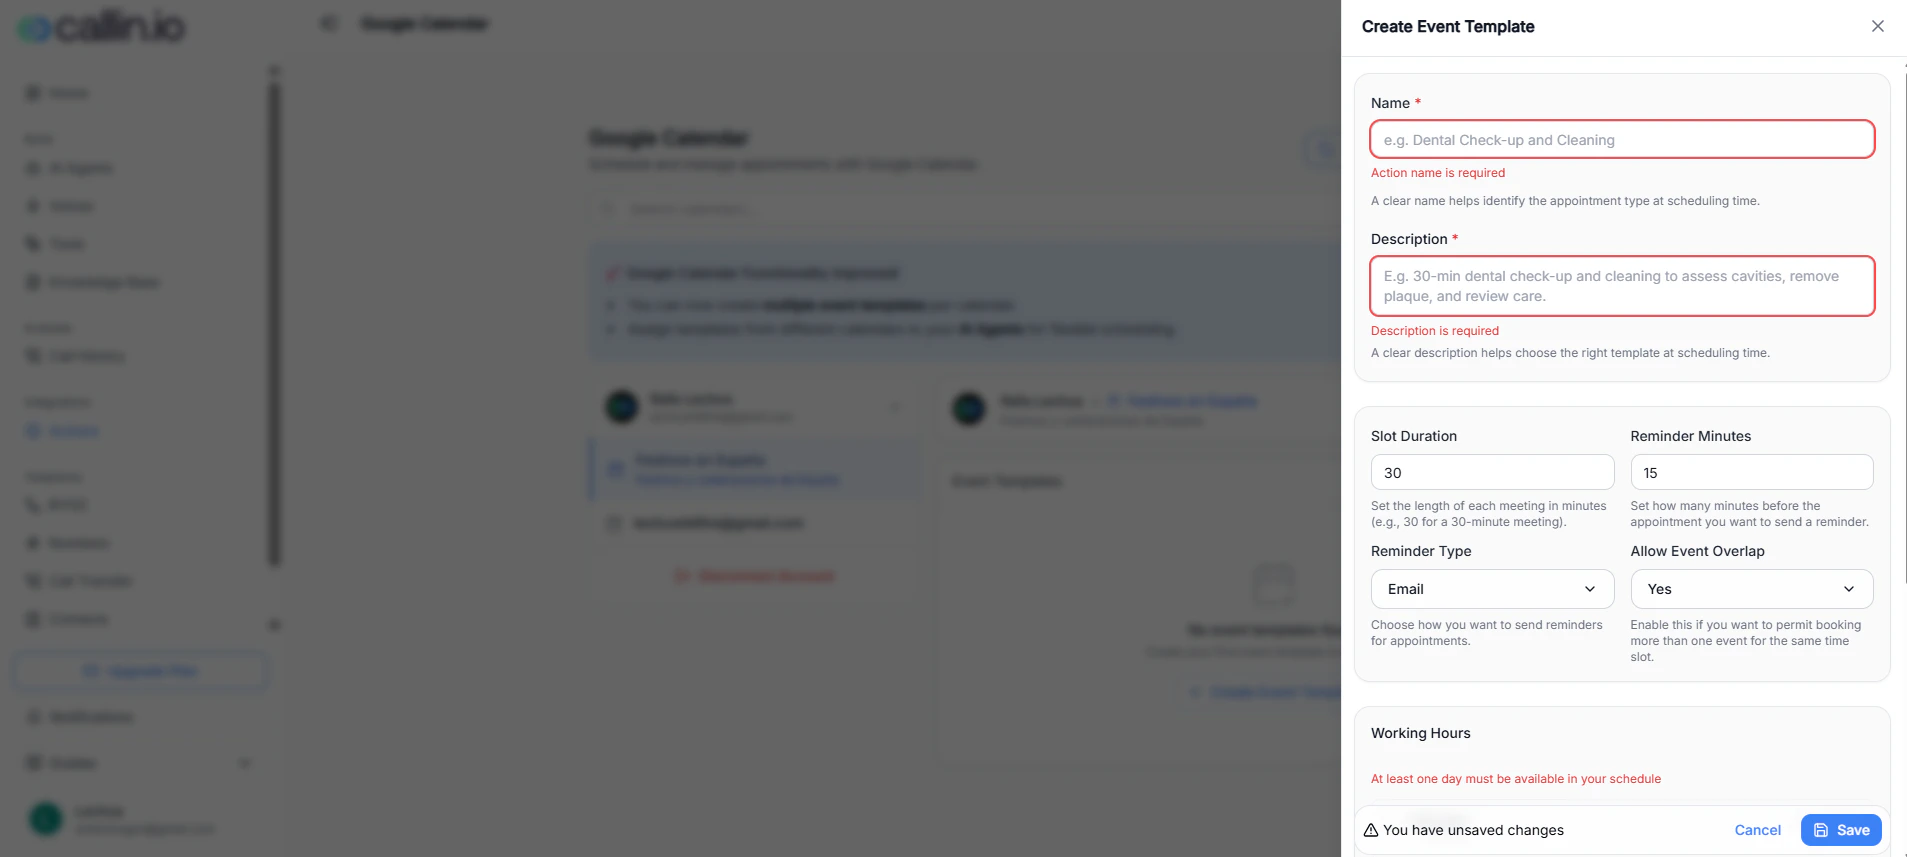
Screenshot: The Event Template editor where you define duration, reminders, conflict rules, and working days.
### Field-by-field explanation (with practical examples) | Field | What it controls | Example you can copy | | ----------------------- | ---------------------------------------------------------------------- | ------------------------------------------ | | **Name** | The label for this appointment type (what you’ll recognize later) | “30-min Intro Call” | | **Description** | Helps your team understand what the appointment is for | “Quick intro + qualify needs + next steps” | | **Slot Duration** | The length of each appointment in minutes | 30 | | **Reminder Minutes** | How many minutes before the appointment the reminder is sent | 15 | | **Reminder Type** | The reminder channel (options may vary) | Email | | **Allow Event Overlap** | Whether the system can book more than one appointment at the same time | No | | **Conflict Handling** | What happens when something overlaps | Block overlapping events | | **Working Hours** | Which days are eligible for booking | Enable Monday–Friday | > **Common mistake:** Leaving **Working Hours** with no days selected. The template won’t be usable until at least one day is enabled. ### A complete example template (recommended starting point) If you want a safe default: * **Name:** “Discovery Call (30 min)” * **Description:** “First call to understand needs and confirm next steps” * **Slot Duration:** 30 * **Reminder Minutes:** 15 * **Reminder Type:** Email * **Allow Event Overlap:** No * **Conflict Handling:** Block overlapping events * **Working Hours:** Monday–Friday This setup prevents double-bookings and gives a clean, predictable scheduling experience. ## Step 4: Attach Google Calendar scheduling to an AI Agent (Call Action) After you have: * Connected a Google account, and * Created an Event Template, You can now enable booking inside an AI Agent. 1. Go to **AI Agents** in the left menu. 2. Open the agent you want to configure and click **Edit**. 3. Go to the **Call Action** tab. 4. Turn on **Schedule Appointment**. 5. Select **Google Calendar** as the provider. 6. Click the **settings icon** (gear) to open configuration and select the template you created. 7. Click **Save**.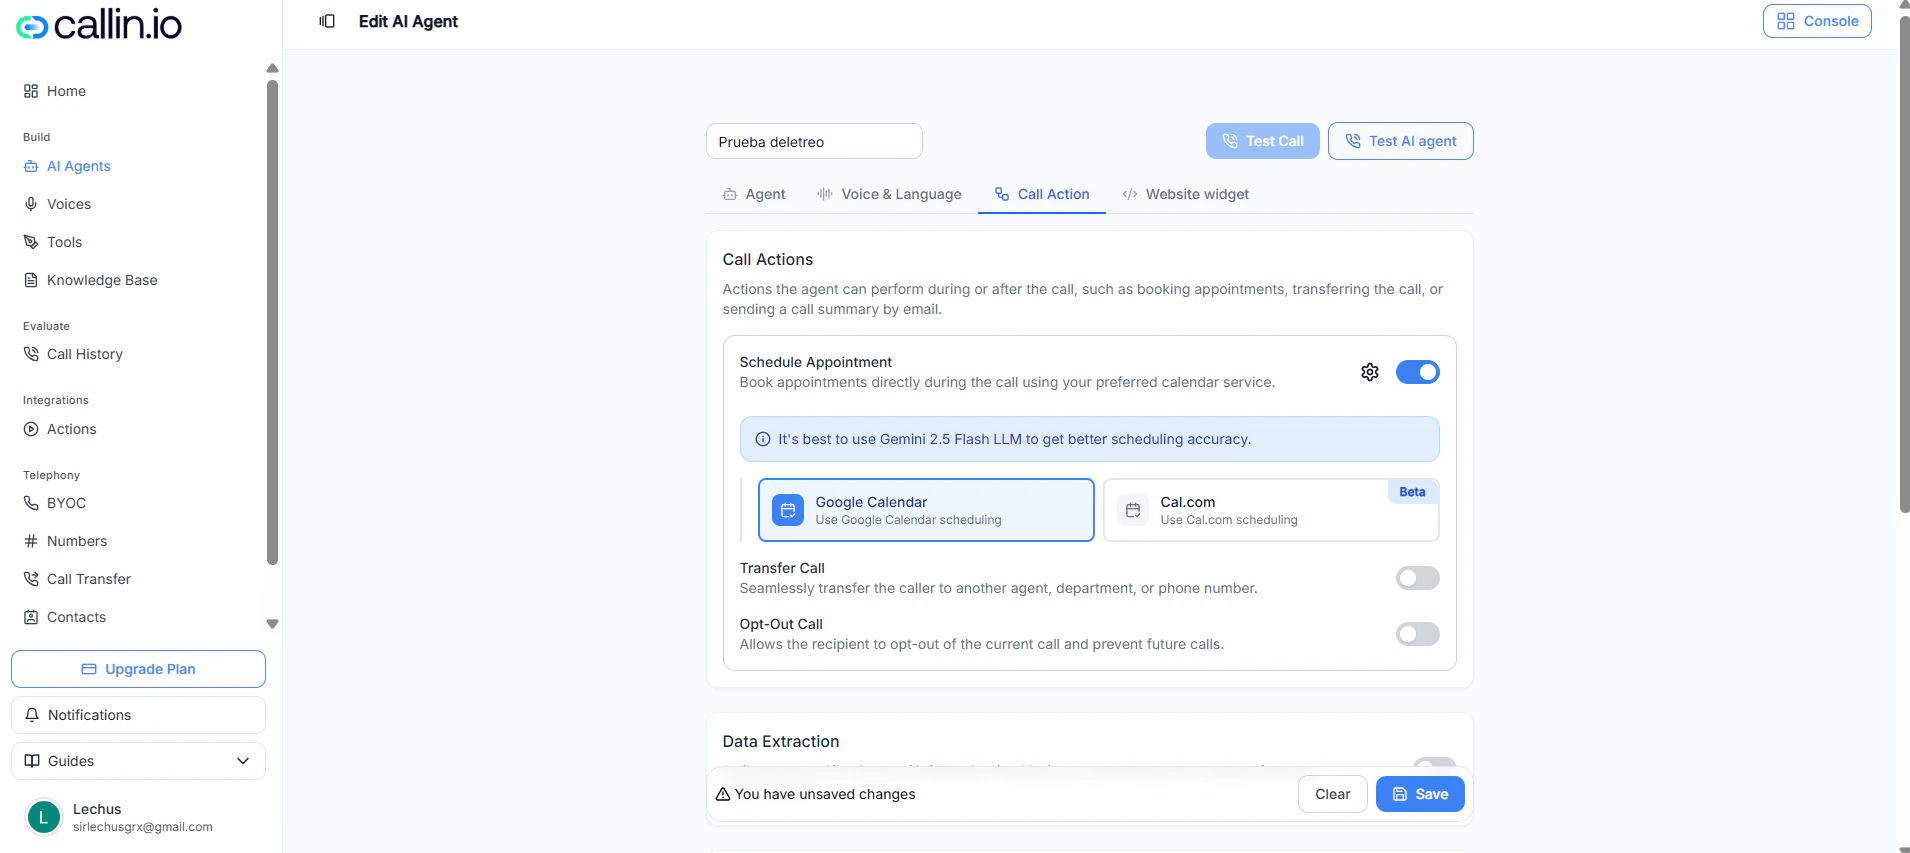
Screenshot: Inside the agent’s Call Action settings, enable scheduling and choose Google Calendar as the booking provider.
> **Important:** For best results, ensure the agent’s timezone matches your calendar’s timezone. A mismatch can cause “wrong time” suggestions. ## How booking should work during a call (recommended conversation flow) Once everything is connected, the best experience is when the agent follows a simple, human flow: 1. **Confirm intent**\ “Sure—do you want to book an appointment now?” 2. **Collect the minimum required details**\ Ask for: * Full name * Phone number\ (Optionally: a short reason for the appointment, if relevant.) 3. **Offer availability and confirm**\ The agent should propose times it can book (based on your template + calendar availability), then confirm the chosen slot. 4. **Book and confirm details**\ The agent books the event and repeats: * Date * Time * Duration * What the appointment is for ### Example (what “good” sounds like) * Caller: “Can I book a time for a consultation?” * Agent: “Yes. What’s your full name and the best phone number for the appointment?” * Caller: “Jordan Lee, +1 555-010-2040.” * Agent: “Thanks. Do you prefer earlier in the day or later? I can book a 30-minute consultation.” * Caller: “Later is better.” * Agent: “Great—does Thursday at 4:00 PM work?” * Caller: “Yes.” * Agent: “Perfect. You’re booked for Thursday at 4:00 PM for 30 minutes. You’ll also receive a reminder before the appointment.” > **Tip:** Keep the prompt focused on **collecting details and confirming**. Let the template handle the scheduling rules. ## Prompt rules: what to include (and what to avoid) ### What you should include in the prompt Your prompt should instruct the agent to: * Ask for name and phone number before booking * Confirm the appointment purpose briefly (one sentence) * Confirm the selected time clearly before finalizing * Confirm booking details at the end A practical prompt instruction (written as plain guidance) could look like: * “When the caller wants to book, ask for their full name and phone number first. Then suggest available times and confirm the chosen time. After booking, repeat the date, time, and duration to confirm.” ### What you should NOT include in the prompt Avoid instructions that duplicate or override the Event Template, such as: * “Only book Monday to Friday” * “Only book between 9am and 5pm” * “Never book same-day appointments” * “Only allow 1 appointment per day” Those rules should be configured in the **Event Template** (Working Hours, conflict rules, overlap rules). Keeping the prompt clean prevents conflicts and improves booking accuracy. > **Important:** Think of it this way:\ > **Template = rules and availability**\ > **Prompt = conversation and data collection** ## Best LLM for scheduling: Gemini 2.5 Flash (recommended) For scheduling accuracy, Callin.io works best with **Gemini 2.5 Flash**. > **Tip:** If scheduling fails (wrong times, missed availability, confusion), switch the agent’s LLM to **Gemini 2.5 Flash**, save, and test again. ## Troubleshooting checklist (quick fixes) ### “I connected Google Calendar but I don’t see my calendar” * Click **Sync** on the Google Calendar page. * Confirm you connected the correct Google account. ### “It says no availability” * Check **Working Hours** in your Event Template (at least one day must be enabled). * Confirm your Google Calendar isn’t fully blocked with busy events. ### “The agent books at the wrong time” * Verify the agent timezone matches the calendar timezone. * If the behavior is inconsistent, switch to **Gemini 2.5 Flash**. ### “Double bookings happen” * Set **Allow Event Overlap** to **No**. * Use a conflict option that blocks overlapping events.