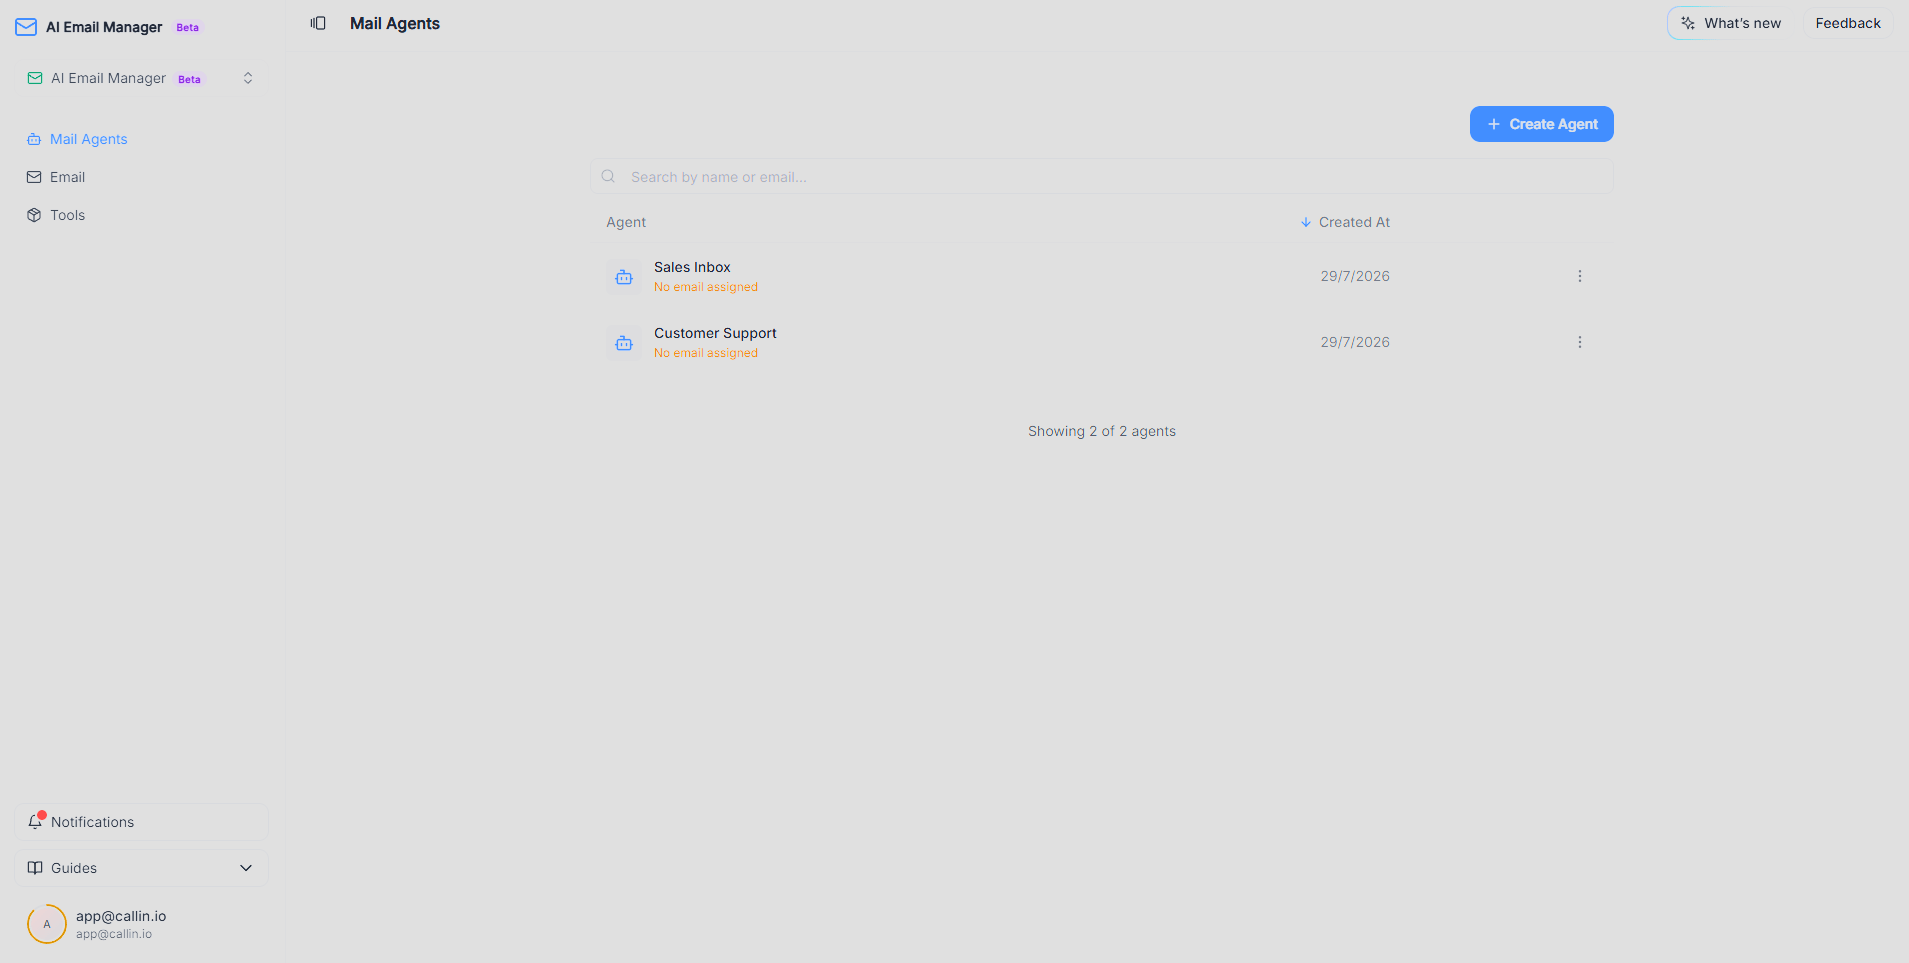
The Mail Agents list. Each agent shows its name, its creation date, and a warning in orange while it has no inbox connected yet.
A short setup wizard opens and walks you through the same settings covered in the next steps of this guide: name, instructions, categories, automation rules and inbox. Don't worry about getting everything right the first time — every step after the name can be skipped, and you can change anything later from the agent's configuration tabs. Give the agent a name that tells you at a glance what it handles, such as "Customer Support" or "Sales Inbox". You have up to 50 characters, and this name appears everywhere the agent does, so favour clarity over cleverness. You can rename it whenever you want from the text field at the top of the agent's screen. Under the name in the list you'll see **No email assigned** in orange. That's normal: it simply means no inbox is connected yet. You'll fix that in step 4. Each row in the list also has a **⋮** menu with three actions: **Copy ID** copies the agent's unique identifier, **Edit** opens its configuration, and **Delete** removes the agent permanently after a confirmation. Deleting an agent only removes its configuration and its connection — your email account and the messages in it are untouched. Once the agent exists, its configuration is organised into four tabs: **Agent**, **Categories**, **Mailbox** and **Advanced**. The next steps follow them in order. ## Step 2 — Tell the agent how to behave Open the **Agent** tab. This is where you shape the agent's personality and judgement. ### Conversation Prompt The **Conversation Prompt** is a box where you write, in plain language, how the agent should handle email. There's no special syntax: you write it the way you'd brief a new colleague on their first day. A short example: > Respond professionally and forward billing questions to a human. The more precise you are, the more predictable the results. A more useful version for a dental clinic might be: "You answer on behalf of Demo Dental Clinic. Be friendly and brief. Answer questions about opening hours, address and prices. If someone asks to change an appointment, tell them a member of staff will get back to them today, and don't promise a specific time." The counter in the bottom right of the box shows how much space you've used out of 4000 characters. That's plenty for a very detailed brief. Any change you save here applies immediately to new incoming mail. > **Tip:** Write down what the agent must **not** do, not just what it should do. Sentences like "never confirm appointments", "never promise refunds" or "never discuss prices over email" prevent most surprises. ### AI Intelligence (LLM) On the right side of the same tab you'll see **AI Intelligence (LLM)**. An **LLM** (large language model) is the engine that reads and writes text: it's the part that actually understands the email and drafts the answer. Click the model card to open a side panel with the choices available. Next to each model you'll see a label such as **(Low)** or **(Medium)**: that's its reasoning effort, meaning how much the model "thinks" before writing. More effort brings more nuance, but also more time and cost per reply. | Model | Reasoning effort | What it's good for | | ------------- | ---------------- | ------------------------------------------------------------------------- | | GPT 5.4 Mini | Low | The default option, balancing quality, speed and cost | | Claude Sonnet | Medium | Replies where tone matters most, with a polished, natural email voice | | GPT 5.4 Nano | Low | High volumes of simple mail, where speed and cost matter more than nuance | | GPT 4.1 Mini | Low | A stable, balanced option for steady, high-volume traffic | In that same panel you'll find **Temperature**, a slider from 0 to 1 that starts at 0.7. It controls how creative or predictable the agent's replies are. Lower values keep the wording consistent and repeatable — useful when replies must follow a template. Higher values make the phrasing more varied and natural, at the cost of more variation between similar messages. > **For beginners:** You don't have to touch any of this. The default model and temperature work well for most inboxes. Come back later: if replies feel robotic, try Claude Sonnet or raise the temperature a little; if they vary too much, lower it. ## Step 3 — Organise your mail with categories Open the **Categories** tab. Categories are optional labels that help the agent understand what kind of message it's dealing with: invoices, complaints, appointment requests, and so on. Each existing category appears as a card with its badge, its description, and a pencil icon to edit it or a bin icon to delete it. They're worth setting up because they let you treat each kind of email differently. You may want the agent to reply on its own to a simple question about opening hours, but only prepare a draft when the message is about money. Click **Add category**. A window opens with these fields: | Field | What it does | Example | | ------------- | ------------------------------------------------------- | --------------------------- | | Category name | The short label you'll see on each email | Billing | | Description | Tells the agent when to use this category | Invoices, payments, refunds | | Badge color | The colour of the label, so you can spot it at a glance | Pink | You can pick one of the preset colours or create your own with the **+** swatch. Below those there are two switches: * **Generate draft reply for this category** — switched on by default. The agent prepares a reply and leaves it ready for you to review before it goes out. * **Auto-reply for this category** — switched off by default. The agent sends the reply itself, with no review. If you switch both off, the agent still labels the message with the category but writes no reply at all. That's useful for mail you always want a human to handle from scratch, like complaints or legal matters. > **Common mistake:** Writing a description that's too vague, like "important stuff". The agent uses that text to decide which emails belong here, so describe the actual content: "messages asking for an invoice, a refund, or a change of payment method". If you notice emails landing in the wrong category, tightening the description is usually the fastest fix. > **Important:** Start with **Generate draft reply** switched on and **Auto-reply** switched off. Read the drafts for a few days. Once you're confident the agent gets the tone and the facts right, turn on automatic replies for the categories where mistakes would be harmless. ## Step 4 — Connect the inbox Open the **Mailbox** tab. This is where you link the actual email account the agent will look after. Until you do, the agent is configured but idle. You have three options: * **Gmail** — connect with your Google account. You approve the connection on Google's usual permission screen, with nothing to configure by hand. * **Outlook** — connect with Microsoft 365, in the same way as Gmail. * **Other email (IMAP & SMTP)** — connect any other provider. **IMAP** is the standard that lets the agent read the mail in your inbox, and **SMTP** is the one that lets it send replies. Your provider publishes both settings in its help pages. If you choose the manual option, the form asks for: | Field | What to enter | | ---------------------- | --------------------------------------------------------------------------------------- | | Email address | The inbox the agent will read from and send from | | Password | Your password, or better, an app password if your account has two-factor authentication | | IMAP host | The reading server, something like imap.yourprovider.com | | IMAP port | Usually 993, which the form suggests by default | | Days of mail to import | How far back the agent looks on first connection, from 1 to 45 days | | SMTP host | The sending server, something like smtp.yourprovider.com | | SMTP port | Usually 587, which the form suggests by default | Under the options the screen reminds you that your credentials are encrypted and stored securely. > **Note:** You can skip this step and connect the inbox later. Everything you configured in the previous steps stays saved. Just remember the agent won't process anything at all until an inbox is linked. ## Step 5 — Fine-tune the behaviour (optional) Open the **Advanced** tab. Everything here is optional, and both rules start switched off. If this is your first agent, you can safely skip to step 6 and come back another day. ### Automation rules **Reply only to a specific sender.** When you switch this on and type an address in **Sender email address**, the agent only processes and replies to messages from that address. Every other sender is skipped entirely, and categories become optional. It's perfect for narrow, single-purpose automations — always answering one automated system or one specific contact — and it's also the safest way to test an agent in a live inbox: point it at your own address and watch what it does, without touching real customers. **Copy automatic replies.** Sends a copy of every automatic reply to an extra address, which you type into **Copy recipient email**. Under **Delivery type** you choose how the copy travels: * **CC (visible)** — the person who receives the reply can see that address in the copy line. * **BCC (hidden)** — the copy is sent silently and the recipient sees nothing. This is handy when a manager wants to keep an eye on what the agent is sending. > **Tip:** If you enable automatic replies in any category, enable the copy as well, at least while you're building trust in the agent's output. > **Warning:** If the copy is going to an internal colleague, choose **BCC (hidden)**. With **CC (visible)** your customer sees your co-worker's email address in every message. ### Agent priority When several agents share the same inbox, the first agent that matches an email is the one that handles it — the message doesn't pass through the rest. This section lets you reorder the agents with up and down arrows. Order them from most specific to most general: an agent restricted to a single sender should sit above a general support agent, so the catch-all one doesn't claim every message first. You'll only be able to change the order once an inbox is connected. Until then, the screen tells you to connect one on the **Mailbox** tab. ## Step 6 — Save your changes When you have unsaved changes, a bar appears at the bottom of the screen with two buttons: **Discard**, which undoes everything you just changed, and **Save**, which stores it. > **Important:** Don't leave the screen while that bar is visible. If you navigate away without clicking **Save**, your changes are lost. ## The Email section: read and reply in one place Open **Email** in the left sidebar. This is the unified inbox: the messages processed by your agents show up here, across every connected mailbox, with the category each one received. It's also where you review, edit and send the draft replies your agents have prepared. If you haven't connected an inbox yet, the screen explains exactly what's missing and how to fix it in three steps: open **Mail Agents** and select an agent, connect Google, Microsoft or IMAP in the **Mailbox** tab, and come back here to read and reply to messages. The two buttons on that screen, **Go to Mail Agents** and **Create mail agent**, take you straight there.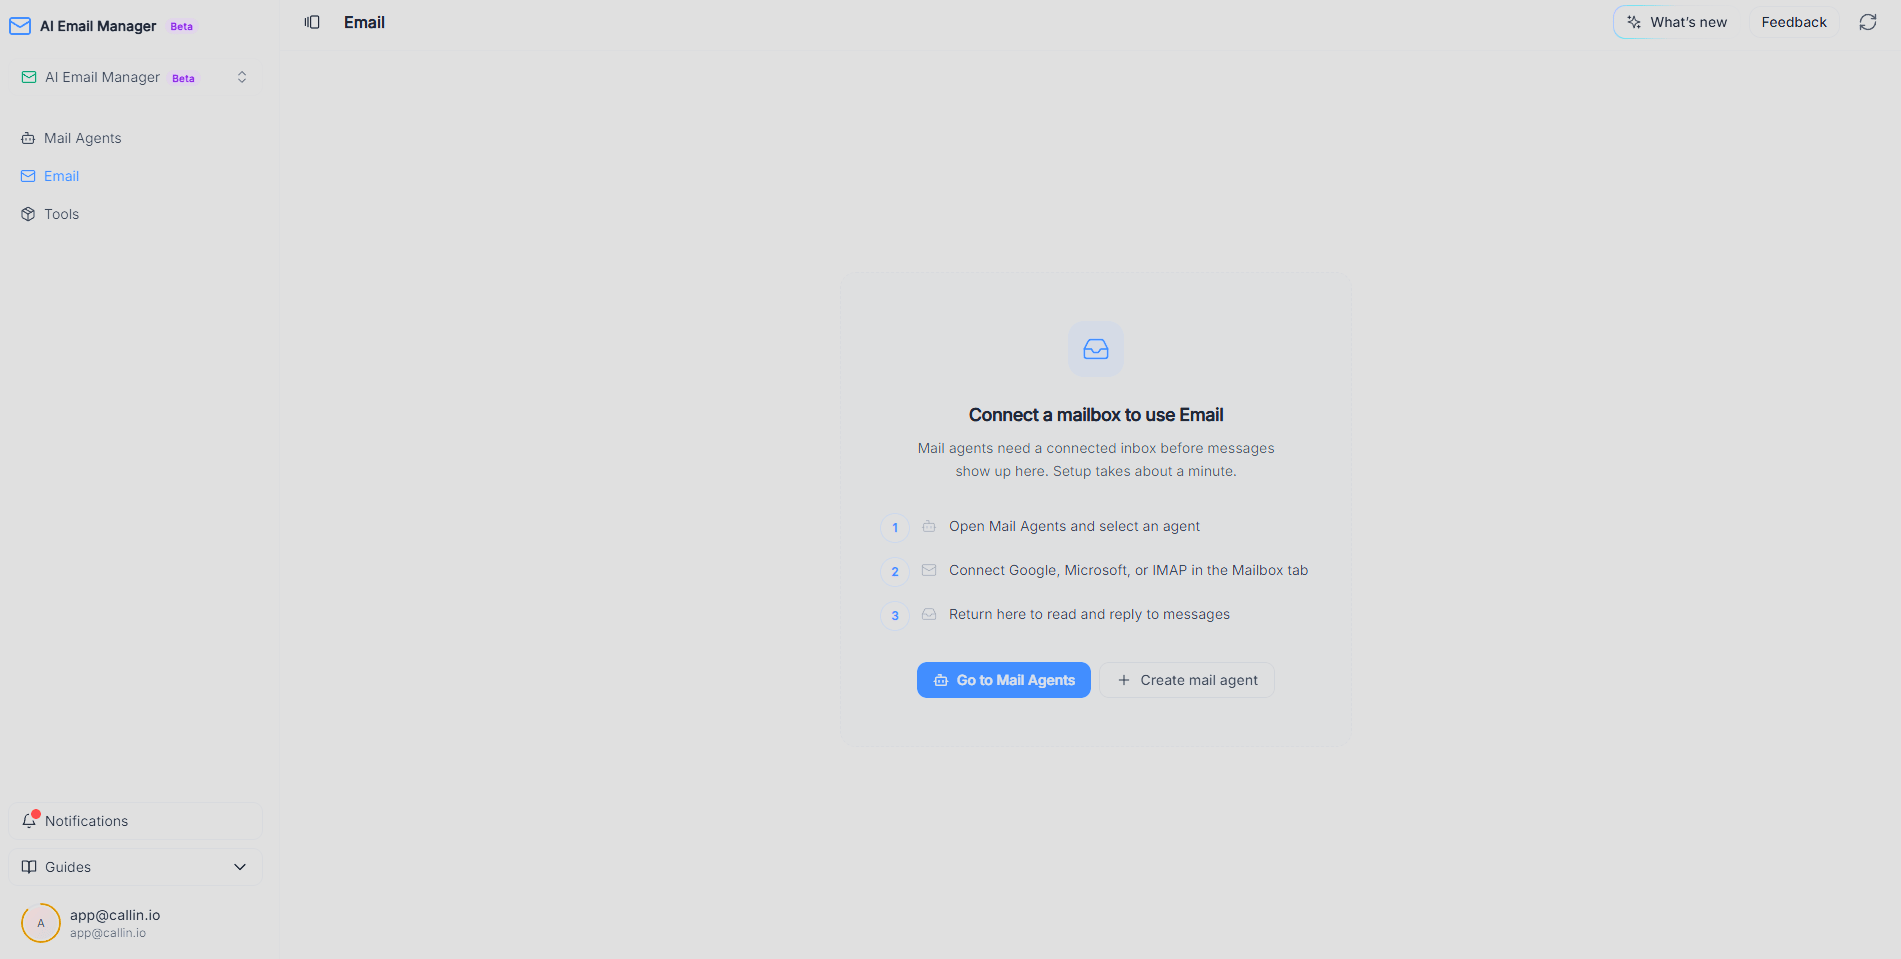
The Email section before any inbox is connected. The screen itself guides you through the three steps left to complete.
Once an inbox is connected, incoming messages appear here a few minutes after they arrive, along with the drafts and replies your agent has prepared. ## The Tools section: give your agents superpowers Open **Tools** in the left sidebar. Here you connect third-party services that extend what your agents can do with each email, giving them access to live data beyond the conversation itself. ### Amazon Seller API With this integration connected, when a customer email contains an Amazon order number, the agent looks up the order details automatically and can use them in its reply, instead of asking the customer for information the system already has.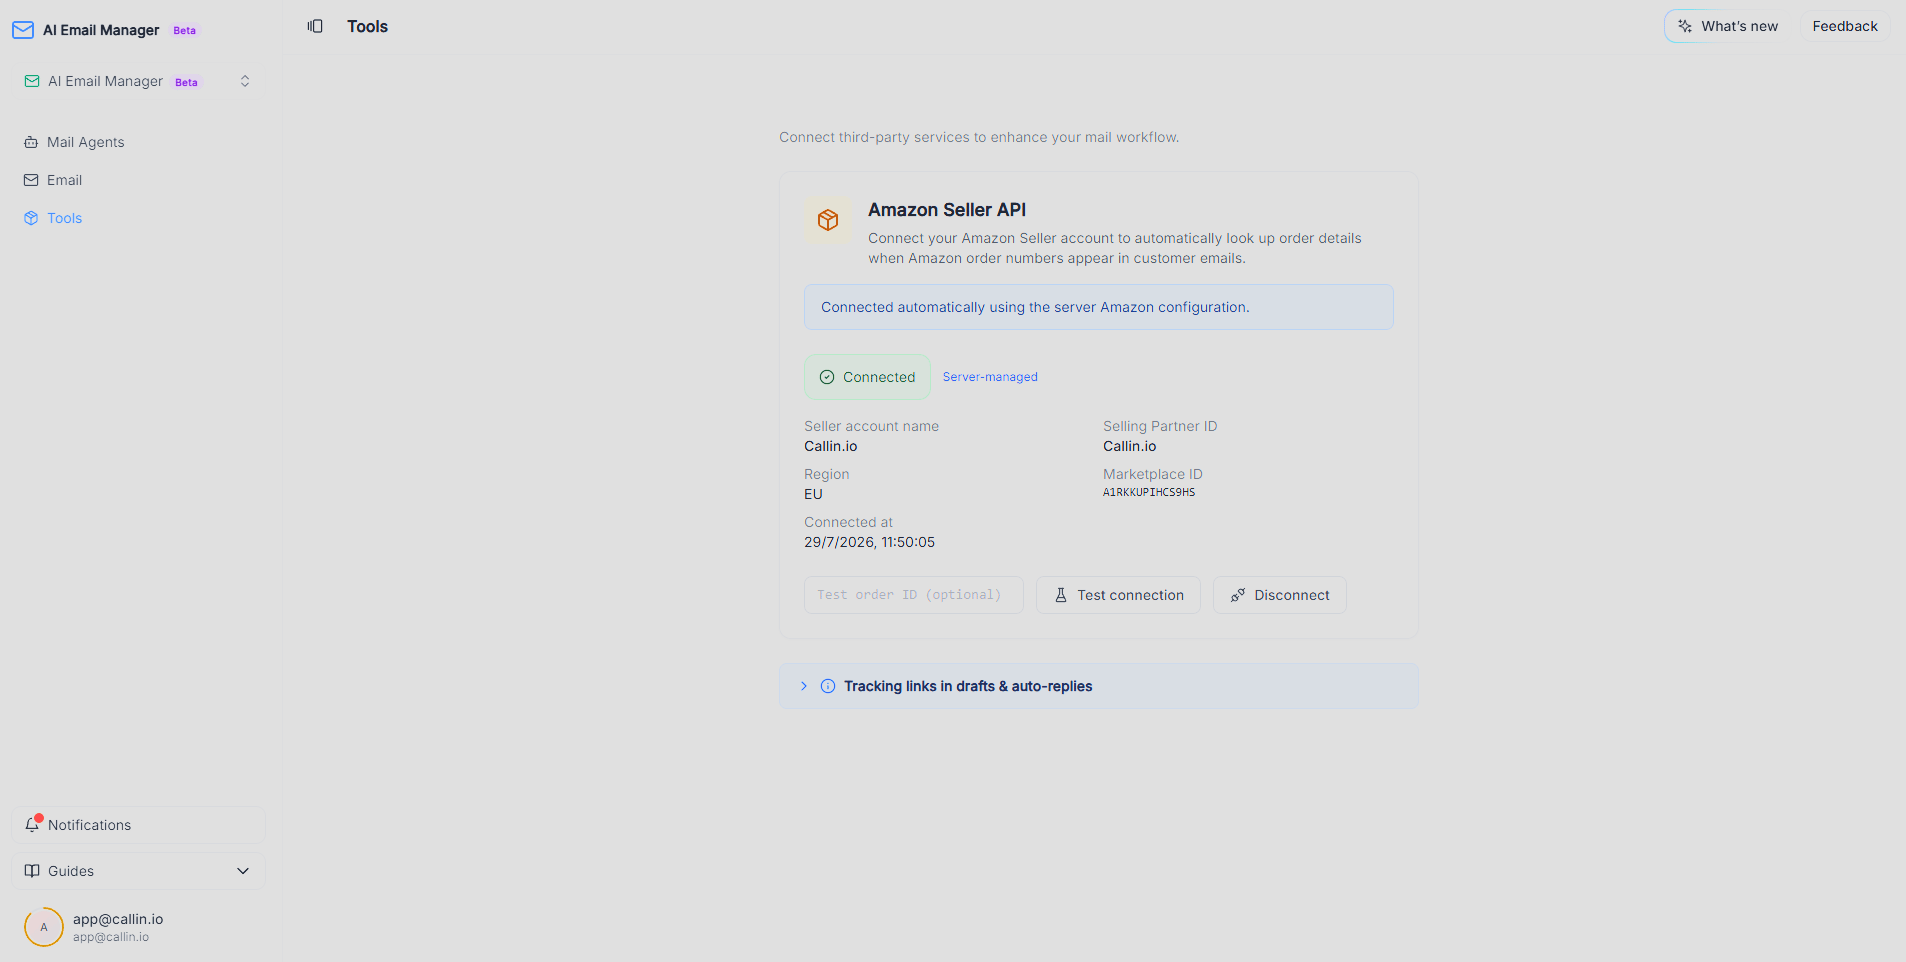
The Tools section with the Amazon Seller API integration connected. The card shows the account details and the connection status.
When the integration is active, its card shows a green **Connected** badge along with the connection details: the seller account name, the Selling Partner ID, the region, the marketplace and the date it was connected. From the same card you can type a real order number into **Test order ID** and press **Test connection** to check everything works without waiting for a customer email, or use **Disconnect** to unlink it. In some accounts this integration is set up automatically with a server-managed configuration. If your card already says **Connected** and mentions the server configuration, there's nothing for you to do. ### Adding tracking links to replies The order data is available to the agent, but it won't appear in a reply unless you tell the agent to use it. To do that, mention it in the Conversation Prompt using variables — placeholders wrapped in double curly braces that get replaced with the real value of each order. For example, add this to the prompt: > When the customer asks about shipping or delivery, include this tracking link: {{amazon_tracking_url}} These are the available variables: | Variable | What it's replaced with | | ---------------------------------- | ----------------------- | | The Amazon order number | | | | The order status | | The marketplace or country of sale | | | The destination country | | | The shipping country | | | The tracking number | | | The tracking link | | | The carrier | | | The shipping service | | > **Note:** For the tracking link to fill in, the integration must be connected, the email thread must contain a recognisable Amazon order number, and the order must already have been shipped — tracking data only exists once Amazon generates it. More tools are expected to arrive in this section as AI Email Manager grows out of Beta. ## How to check it worked Three quick signs that everything is in place: 1. In the **Mail Agents** list, your agent no longer shows **No email assigned** underneath its name. 2. Send a test email to the connected inbox from a different address of your own, using wording that matches one of your categories. 3. Wait a few minutes and open the **Email** section. Depending on how you set up that category, you should find either a draft ready to review or a reply already sent. If nothing happens, check three things in order: that the inbox really is connected, that **Reply only to a specific sender** isn't switched on and pointing at a different address from the one you tested with, and that your test email actually matches a category description — an automatic reply only goes out when the message is classified into a category that has auto-reply enabled. ## What to do next * Write a couple more categories now that you've seen the agent in action. Real emails always suggest labels you hadn't thought of. * Visit the **Email** section every day during the first week to review your agent's drafts and polish the Conversation Prompt with what you learn. * Take a look at **Tools** from time to time: new integrations can appear as the product grows.