What this section is for
Subscription Plans is where a white-label account defines the plans that will be available to its sub-accounts (your customers). Those sub-accounts can then offer these plans to their own end users—for example, to sell monthly minutes, enable paid add-ons, or control which features are included per tier. After you set up plans here, you typically use them to:- Create clear tiers (Starter, Pro, Enterprise) with different minutes and pricing.
- Decide whether customers can buy extra minutes after they consume their included minutes.
- Mark one plan as Popular so it stands out on your pricing page (if shown in your setup).
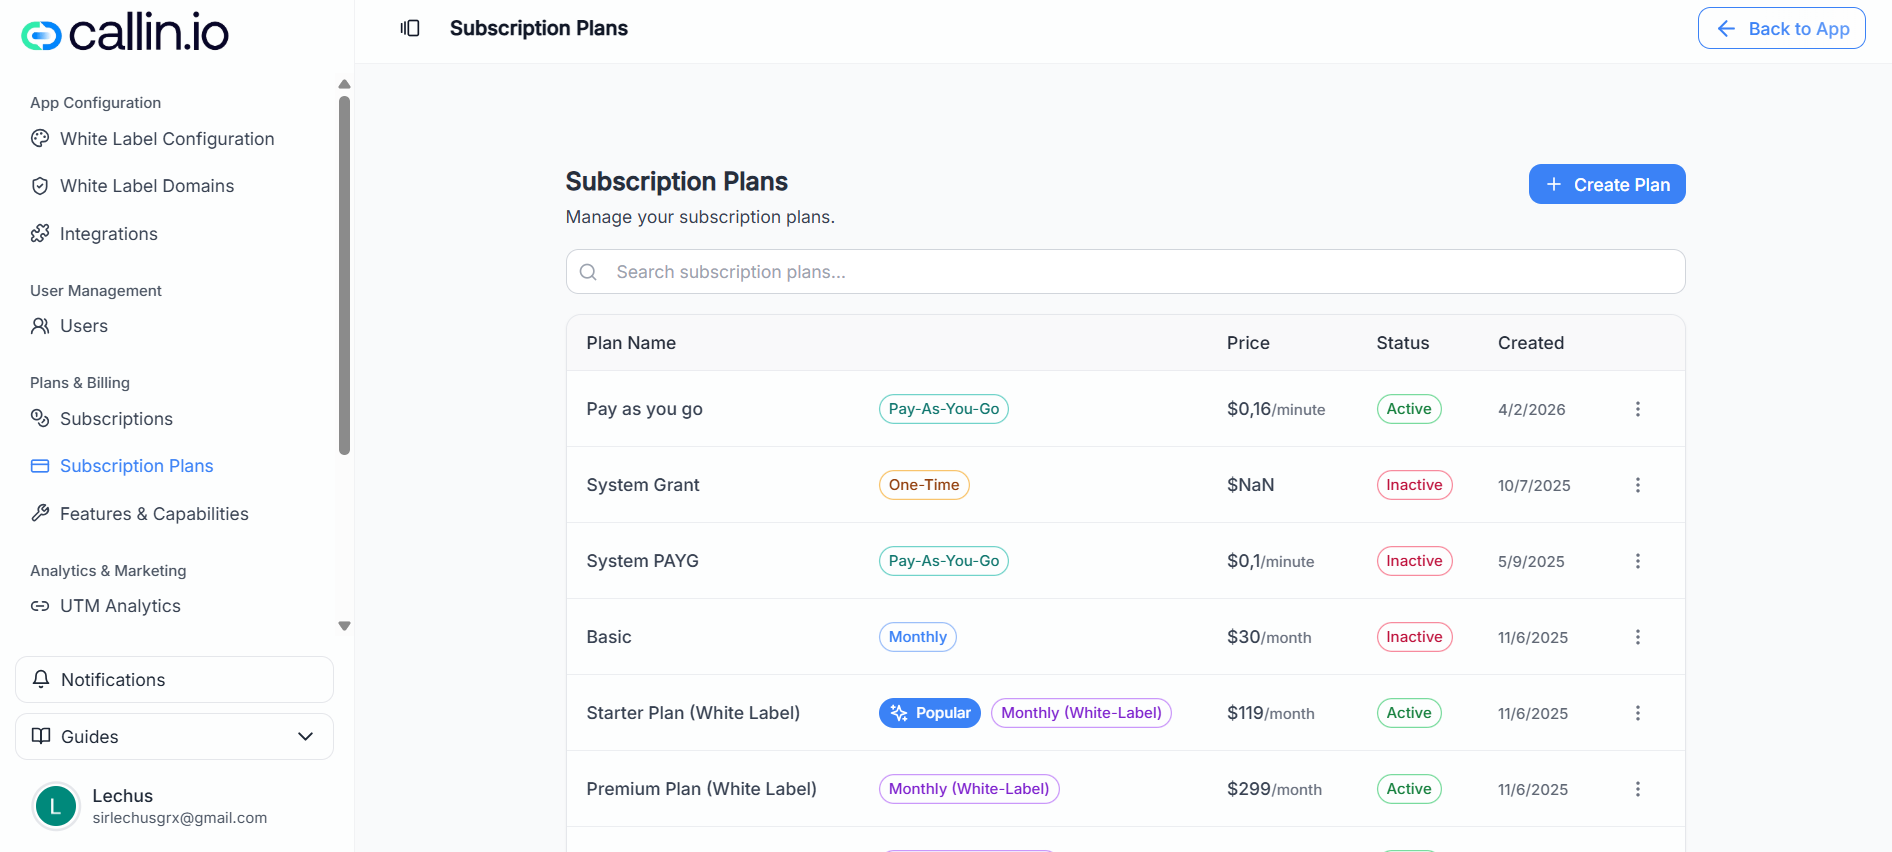
Screenshot: the Subscription Plans list, where you can search plans, create a new one, and manage existing plans from the actions menu.
Create a new subscription plan
From Plans & Billing → Subscription Plans, click Create Plan. A guided flow will walk you through the setup step by step.Tip: Before creating plans, decide your tiers and pricing on paper first (e.g., “Starter: 400 minutes/month for $300”). It makes the setup faster and avoids later changes.
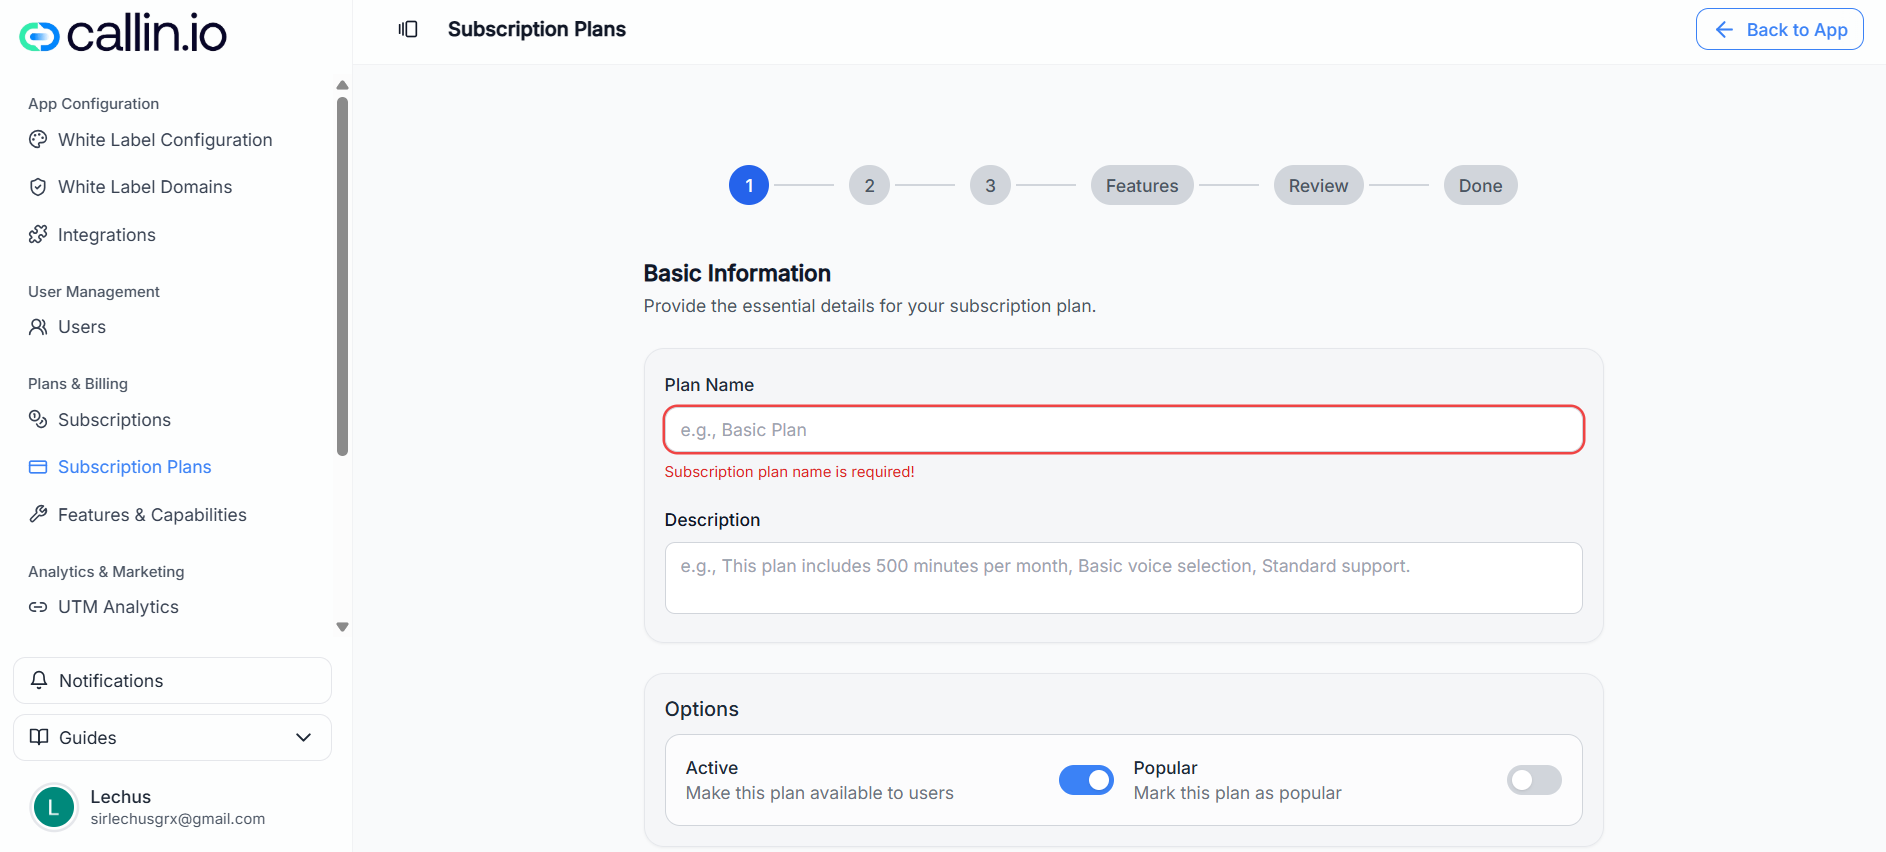
Screenshot: Step 1 of the plan creation wizard, where you name the plan, add a description, and choose whether it’s Active and/or Popular.
Step 1: Basic information
Fill in the essentials:- Plan Name: Required. This is what your customers will recognize (e.g., Starter, Growth, Pro).
- Description: Optional but strongly recommended. Explain what’s included in plain language.
- Active: When enabled, the plan is available to users.
- Popular: When enabled, this plan can be highlighted as a recommended option.
- Plan Name: Starter
- Description: “Includes 400 minutes per month. Great for small teams who want reliable call coverage and a predictable monthly price.”
- Active: On
- Popular: On (only for the plan you want most people to choose)
Common mistake: Leaving the description empty. A short description reduces confusion and support tickets (“What’s included in this plan?”).
Step 2: Choose a plan type
Select how you want to bill:- Monthly Subscription: Recurring monthly billing with a set number of minutes and a fixed monthly price.
- One-Time Purchase: A single payment for a fixed amount of minutes.
- Pay as You Go: Pay per minute with flexible usage.
Important: The available plan types may vary depending on your account setup.
Step 3: Pricing & minutes
The next screen depends on the plan type. For a Monthly Subscription, you typically configure:- Available Minutes per Month: How many minutes are included every month (e.g., 400).
- Price: The monthly price users pay (e.g., $300/month).
- Additional Minutes: Allow customers to purchase extra minutes beyond the included monthly minutes.
- If enabled, set the Rate per Additional Minute (e.g., $0.30/min).
- Annual Billing: Offer yearly billing with a discount (when available in your setup).
- Included minutes: 400 minutes/month
- Monthly price: $300/month
- Additional minutes: Enabled
- Additional minute rate: $0.30/min
- A customer pays $300 each month and gets 400 minutes.
- If they use 430 minutes, the extra 30 minutes are billed at 9).
Step 4: Configure features
On the Features step, you assign values to the features that exist in your platform setup (often defined under Features & Capabilities). Depending on the feature, you might set:- A toggle (on/off)
- A numeric limit
- A text value
- Feature: “Starter minutes”
- Value: 400
Step 5: Review & create
Before creating the plan, you’ll see a summary of what you configured:- Basic information (name, description, status)
- Plan type
- Pricing & minutes
- Features
Tip: Double-check the minutes and price together. Most pricing mistakes are just a mismatch (e.g., “400 minutes” but priced like the “1000 minutes” tier).
Edit an existing plan
To edit a plan, go to the plans list, open the three-dot menu, and choose Edit Plan. Inside the editor you typically see tabs such as:- Basic Info: Update name, description, and toggles like Active/Popular.
- Features: Adjust feature values for this plan.
- Pricing & Minutes: Update included minutes, price, and additional-minute settings.
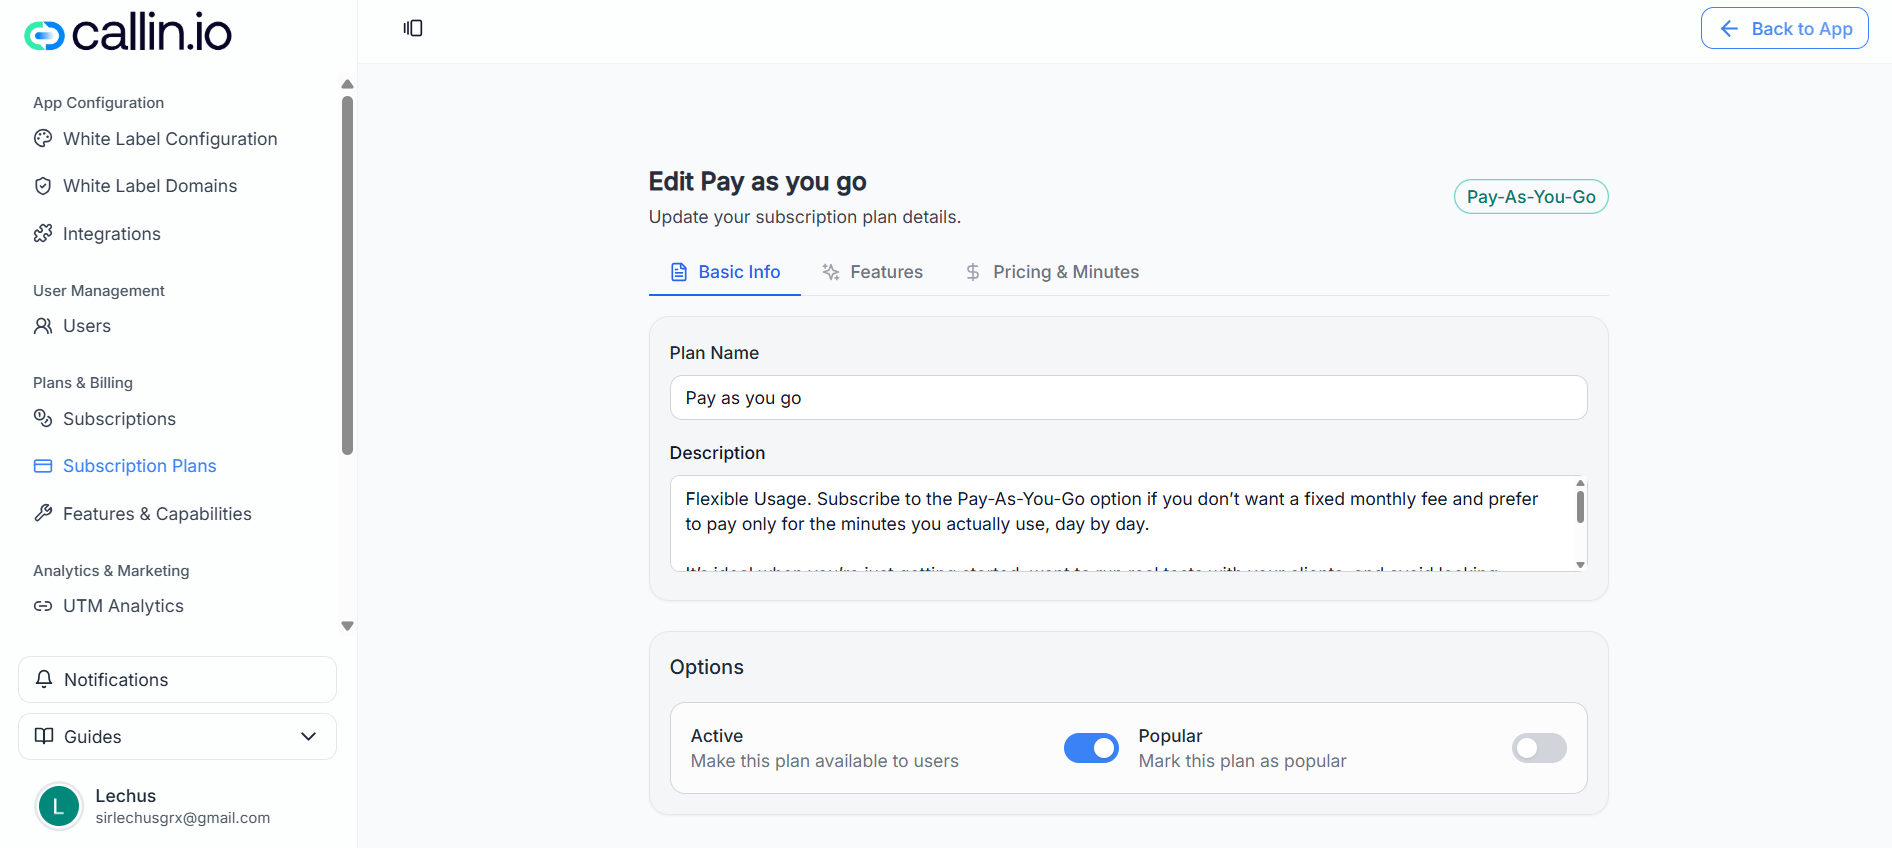
Screenshot: editing a plan’s pricing and minutes, including the notice that price changes create a new Stripe price and won’t affect existing subscribers.
Important: When you change a plan’s price, the platform may create a new price in Stripe. Existing subscribers can continue on their current price and may not be affected by the change (behavior can vary depending on your billing setup).
Manage plan lifecycle (Copy ID, deactivate, and search)
From the plan list actions menu, you can typically:- Copy Plan ID: Useful for support, troubleshooting, or matching the plan inside other areas of the platform.
- Deactivate Plan: Stops offering the plan to new users.
- Search: Use the search bar to quickly find a plan by name.
Common mistake: Deactivating a plan without first creating a replacement. If you need to retire a plan, create the new plan first, then deactivate the old one so new customers don’t get stuck without options.