Overview
The Campaigns section is where you set up and run outbound calling campaigns, then track how they performed. From here you can:- Create a campaign with an AI Agent
- Select contacts (or upload a CSV inside the campaign flow)
- Launch immediately or schedule for later
- Monitor progress and outcomes
- Review performance in Campaigns Analytics
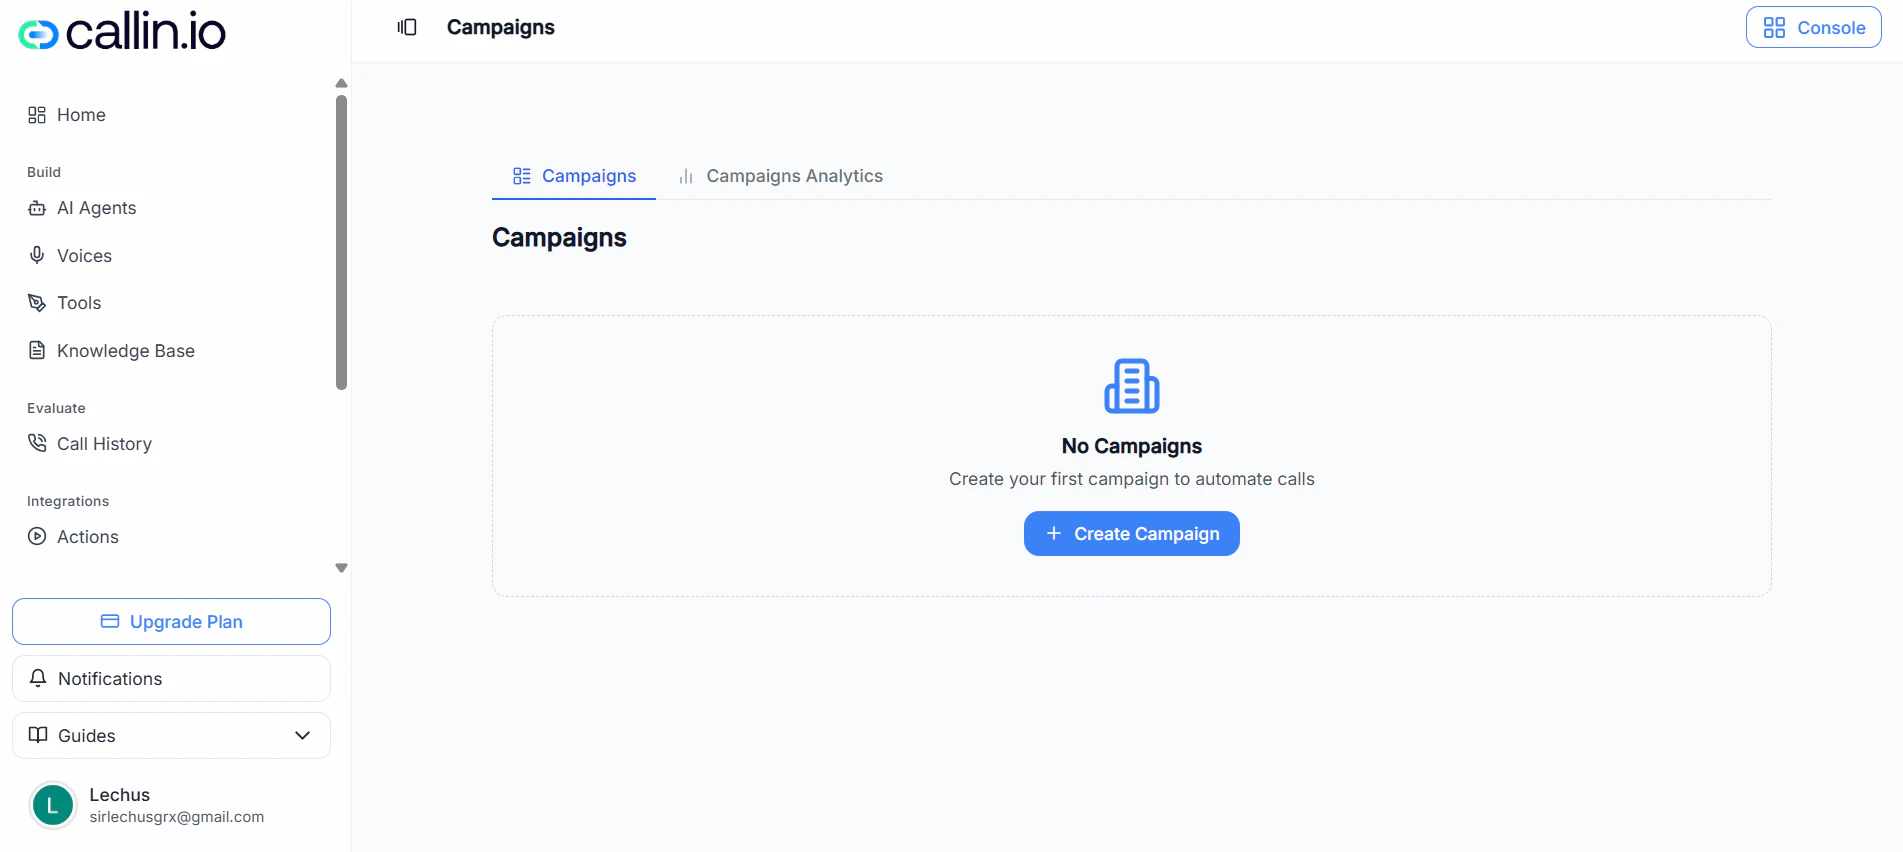
Screenshot: Your campaigns list, where you can filter, create new campaigns, and open a campaign to view details.
Create a campaign
Click Create Campaign to open the campaign setup panel.1) Basic information
Fill in:- Campaign Name (required)
- AI Agent (required)
Important: The UI warns that the agent should have a number assigned during campaign execution. If the agent can’t place calls, the campaign won’t work properly.
2) Select contacts
In Select Contacts, you can:- Search contacts using Search contacts…
- Narrow the list with Filters
- Select one or multiple contacts using the checkboxes
- Navigate large lists using pagination
- Use Upload CSV if you want to bring contacts into this campaign from a file
Tip: If your contacts are already in a spreadsheet, export them as a .csv file before uploading.
3) Map columns (when uploading CSV)
If you upload a CSV, you’ll be asked to map columns before continuing. Typical fields include:- Phone (required)
- Name (optional)
- Email (optional)
Common mistake: Not mapping Phone. The campaign can’t add contacts without a phone number.
4) Launch options
Under Launch Options, choose how and when the campaign runs:- Launch Now: starts immediately.
- Schedule for Later: lets you set:
- Start Time
- End Time
- Timezone
Important: Follow-up behavior can vary by workspace settings. If you’re not sure how retries work in your account, run a small test campaign first.
Manage campaigns
Filter and find campaigns
Use the filter bar to narrow down what you see, for example:- Search by Campaign ID or Name
- Filter by Status
- Limit results by Date Range
- Toggle Show Deleted to view deleted campaigns (if available in your account)
View campaign details
Click View on a campaign card to open its details. Inside, you can typically see:- Campaign progress
- Counters (e.g., in progress, busy, no answer, completed, failed)
- A contact-level table with statuses and outcomes
- A Refresh option to update results
Delete a campaign (permanent)
Campaign cards may include a delete (trash) icon. When you delete a campaign:- You’ll see a confirmation modal
- You may be required to type DELETE to confirm
Important: Deleting a campaign is a permanent action and cannot be undone.
Campaigns Analytics
Switch to Campaigns Analytics to understand how campaigns performed over time.What you can review
In the analytics overview, you can typically review metrics like:- Total calls
- Average call duration
- Usage
- Appointments
- Detection and success rates
- Trends and breakdowns (volume over time, outcomes, key metrics)
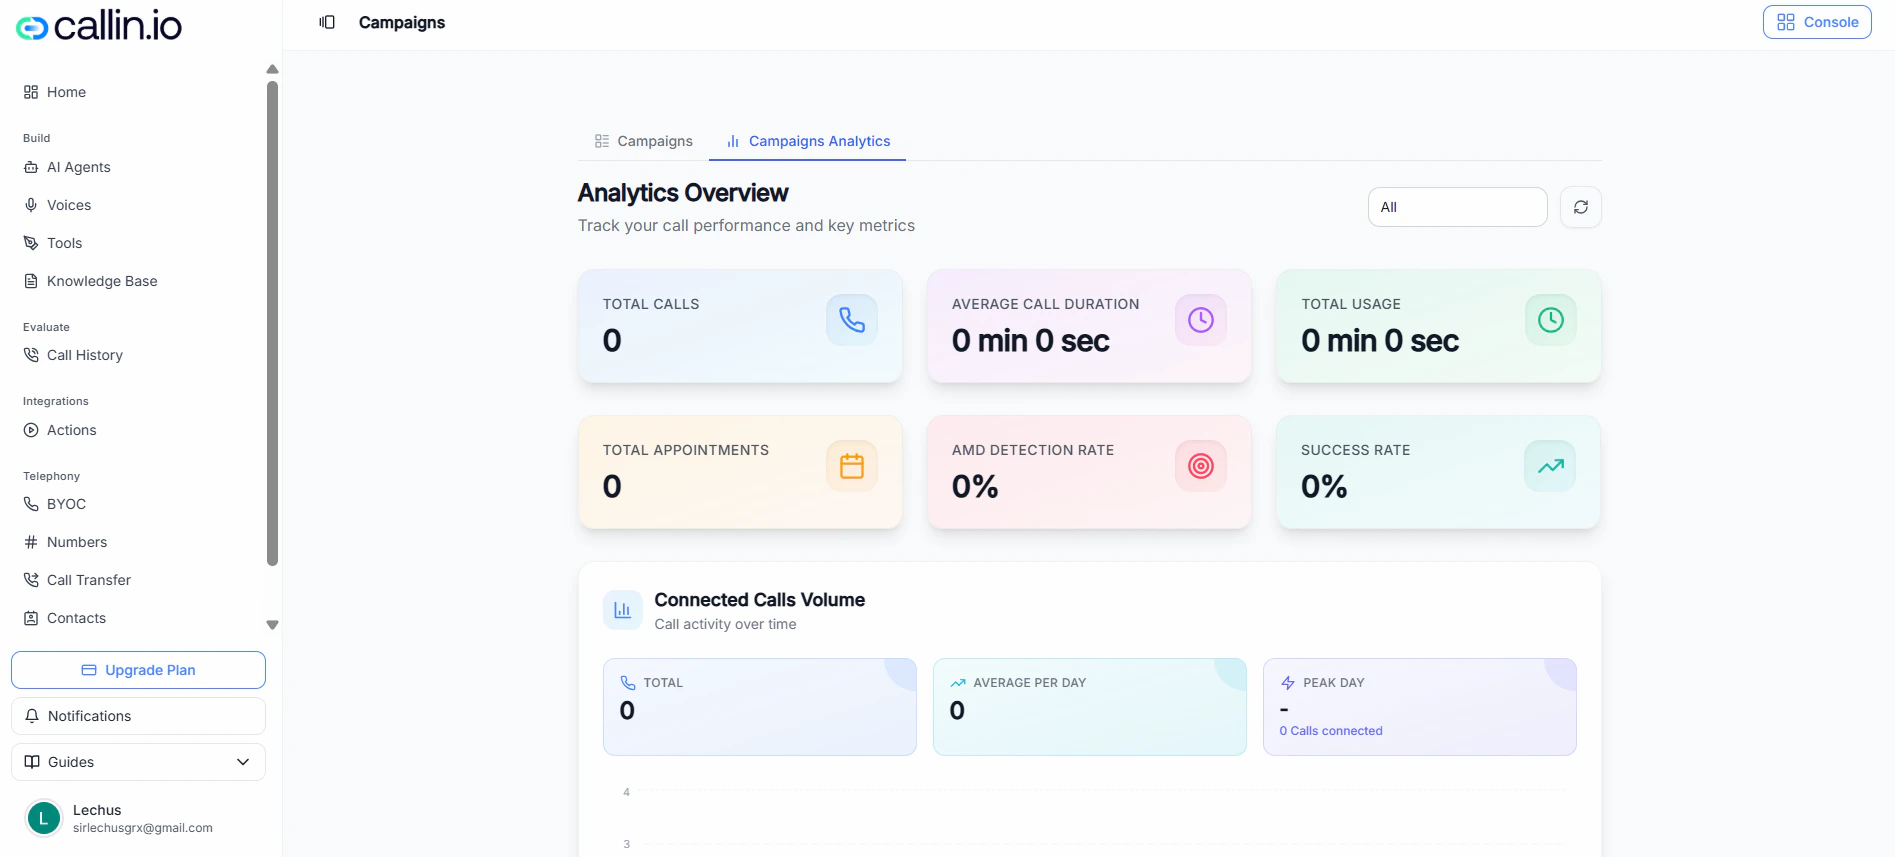
Screenshot: Campaigns Analytics overview, where you can review performance metrics and trends.