Overview
The Contacts page is where you manage who you’ll call. From here you can:- Add contacts manually (one or many)
- Upload a CSV to import a larger list
- Search and filter your contact list
- Export your contacts to CSV
- Start campaigns using selected contacts
- Delete selected contacts (permanent)
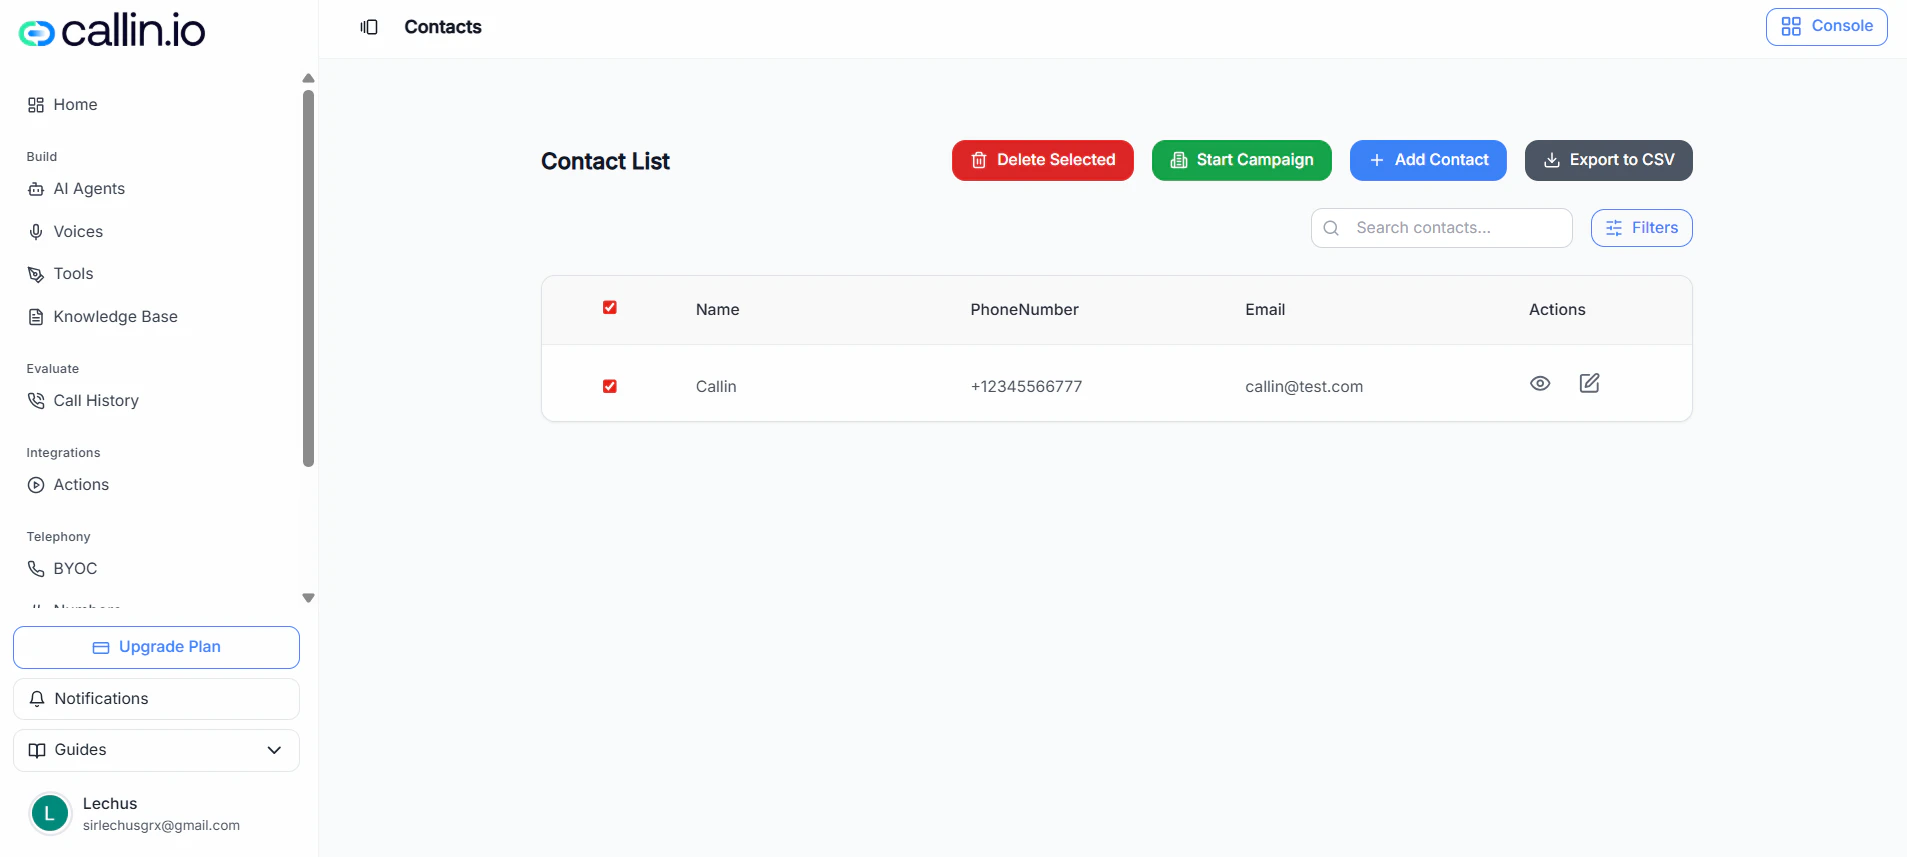
Screenshot: The Contacts page where you can add/import contacts and manage your list.
Add contacts manually
Manual entry is best when you’re adding a few contacts quickly (or pasting from a spreadsheet).Steps
- Click Add Contact.
- Fill in the fields you need:
- Name (optional)
- Phone Number (required)
- Email (optional)
- Add more people by adding more rows (if available in your modal).
Important: Phone Number is required for every contact.
Editing tips (like a spreadsheet)
In the add-contacts grid you can usually:- Click and drag to select multiple cells
- Copy and paste values into the grid
- Double-click a cell to edit
- Press Enter to add a new row
- Press Esc to clear selection
Tip: If your contacts are already in Google Sheets/Excel, copy the cells and paste them directly into the grid.
Optional columns
You may see an Add Column button in the modal. This lets you include extra fields if your workspace supports them.Important: Available columns can vary by account or plan.
Import contacts from a CSV
CSV import is best for larger lists.Upload requirements
- File type: CSV only
- Max size: 10MB
- You can upload by selecting a file or dragging and dropping it.
Common mistake: Uploading an .xlsx file. Export it as CSV first.
Upload a CSV
- Click Upload CSV.
- (Optional) Click Download Template to start from the recommended format.
- Upload your CSV by clicking Select File or dragging the file into the upload area.
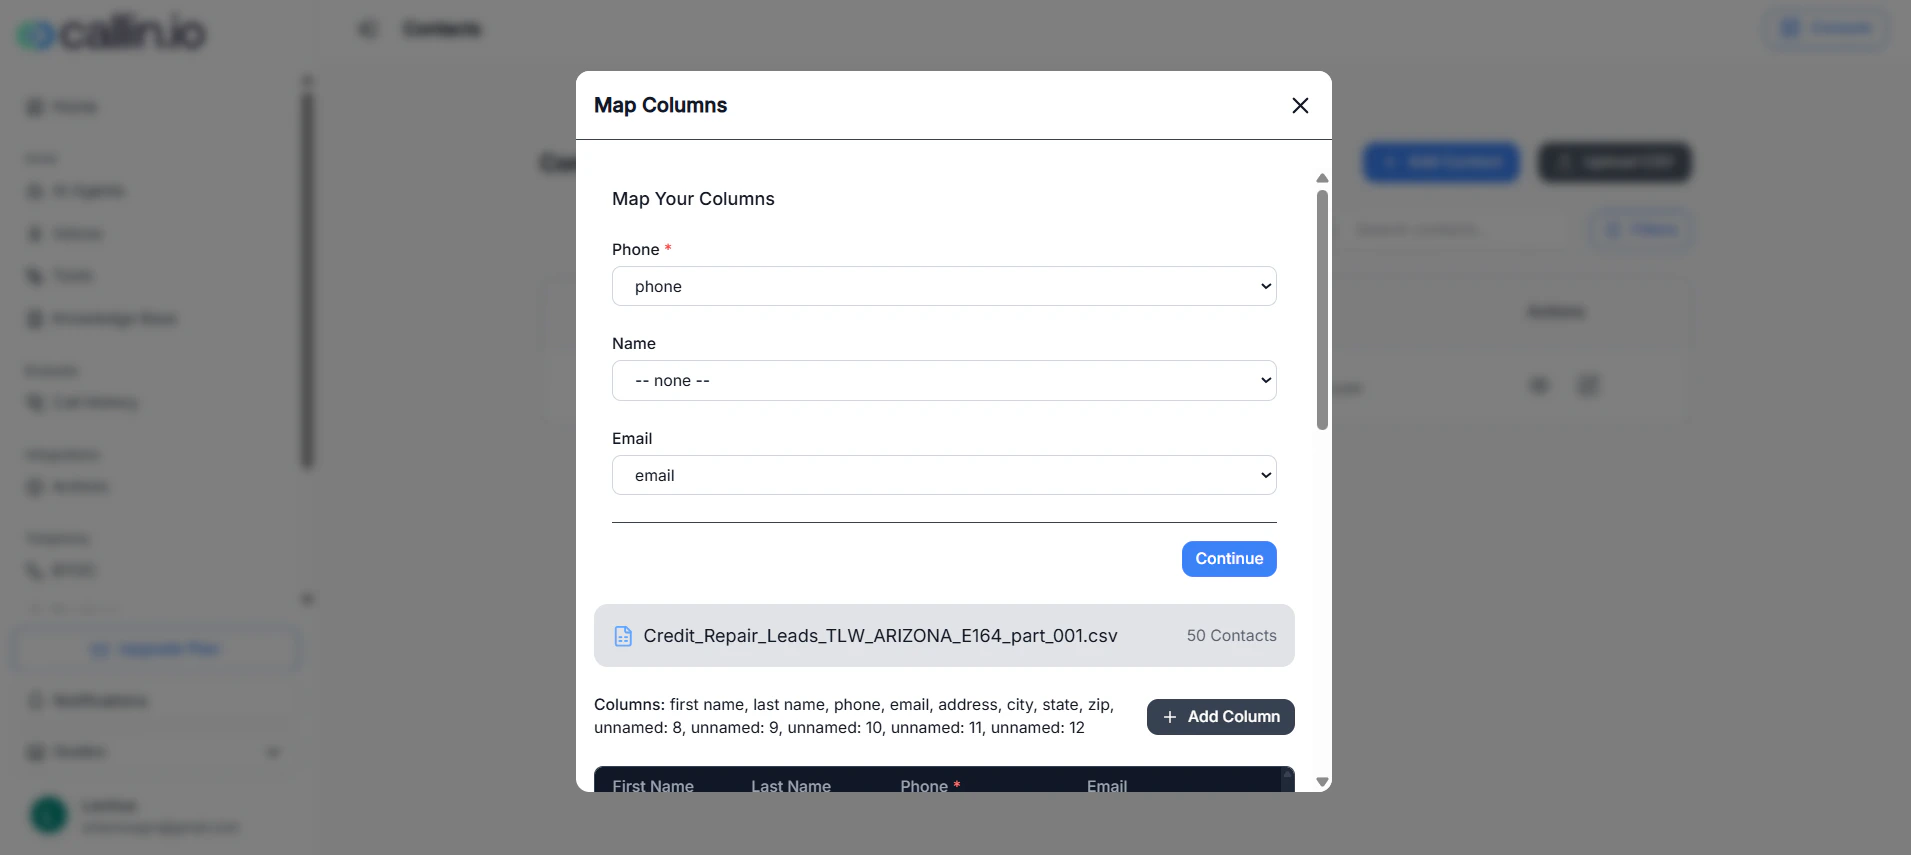
Screenshot: CSV upload modal, including the CSV-only requirement and the 10MB limit.
Map your columns
After upload, you’ll map your CSV headers to the fields Callin will import.- Phone (required)
- Name (optional)
- Email (optional)
Important: If Phone is not mapped, the import can’t continue.
Validation rules (applies to manual + CSV)
- Phone numbers must include a country code (example: +1234567890)
- Phone numbers must be 7–15 digits (excluding country code)
- Phone numbers are required for all contacts
- Email addresses must be valid if provided
- Fields with validation errors are highlighted with a red border
- Empty fields are highlighted with a red border
Tip: If your CSV has phone numbers without country codes, add the country code before importing to avoid validation errors.
Manage your contact list
Search and filters
- Use Search contacts… to find people by name, phone, or email.
- Click Filters to narrow down your list.
Important: Filter options can vary by account or plan.
View and edit
In the Actions column, you can typically:- View contact details
- Edit the contact
Export to CSV
Click Export to CSV to download your current contacts list.Start a campaign from Contacts
- Select one or more contacts using the checkboxes.
- Click Start Campaign.
- Enter a campaign name and select an agent.
- (Optional) Enable Follow-up Calls.
- After 2 hours
- After 1 day
- After 3 days
Tip: If you’re testing, start with a small selection (5–10 contacts) to confirm your agent and script behave as expected.
Delete selected contacts (permanent)
- Select the contacts you want to remove.
- Click Delete Selected.
- Confirm the deletion (you may need to type DELETE).
Important: This is a permanent action and cannot be undone.