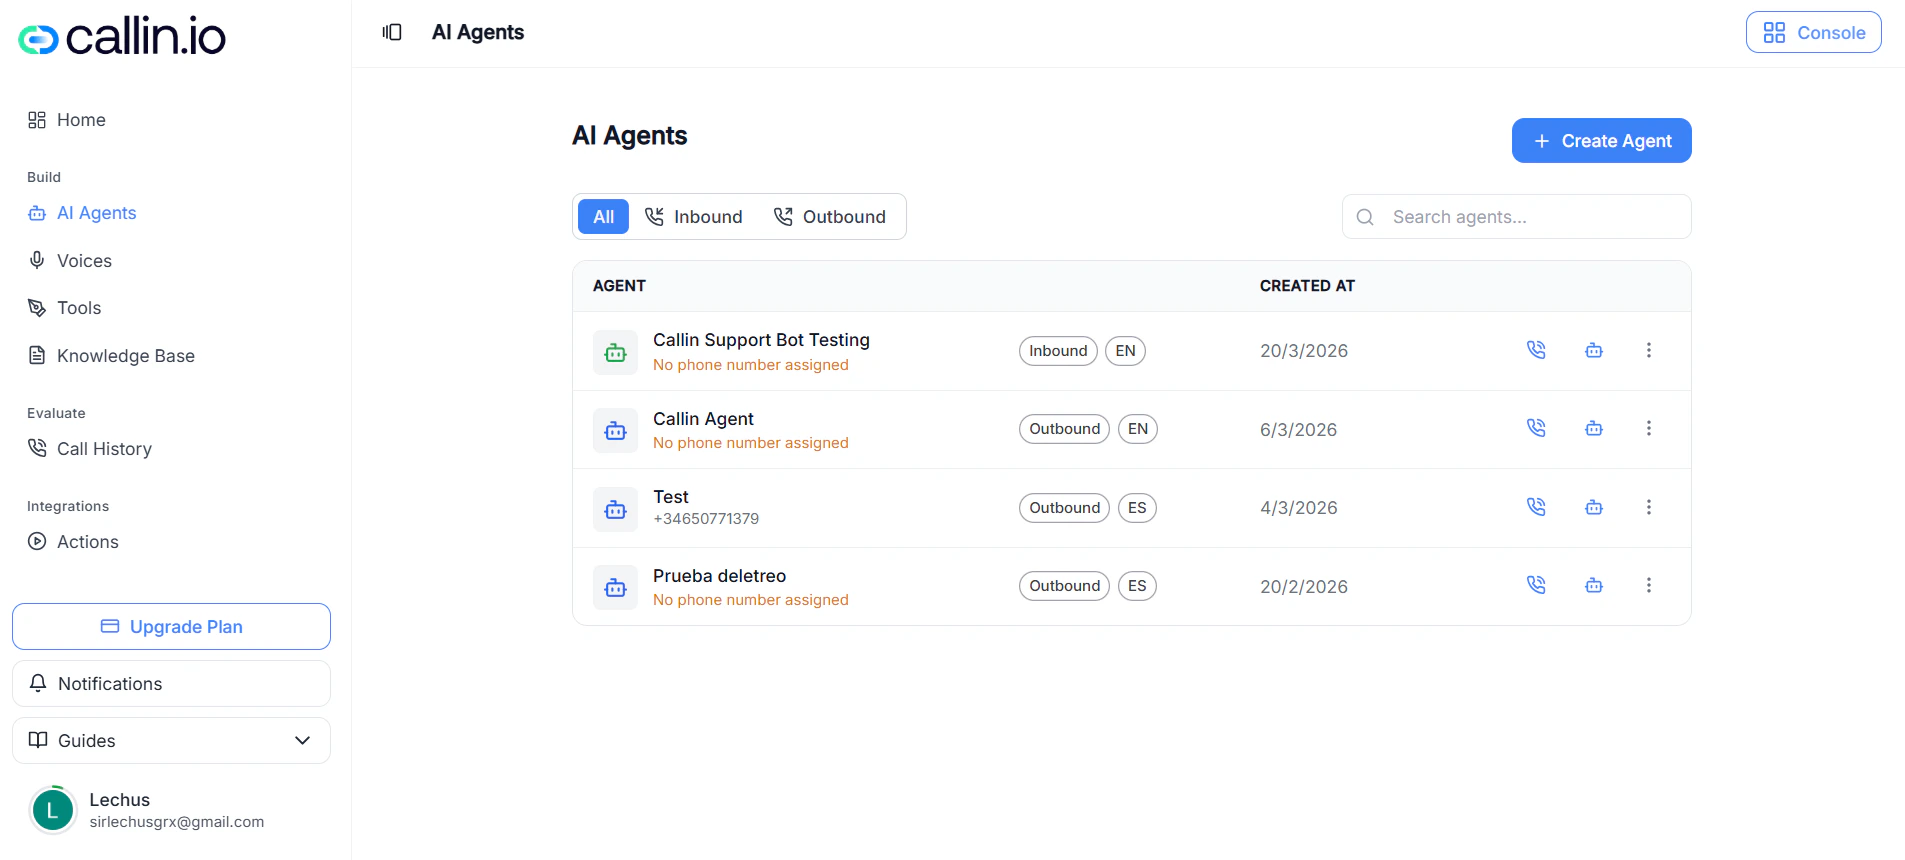
Screenshot: the Create Agent page. Each tab at the top opens a different part of the agent’s configuration.
Tip: Walk through the tabs in order the first time. Each one builds on the previous, and a clean setup is much easier to test and maintain later.
Section 1: Agent
The Agent tab is where you define the core identity and behavior of your assistant: how it should talk, which voice and language it uses, which AI model powers it, and whether it answers incoming calls, makes outgoing ones, or both. A good setup here makes every later section work better. A weak one creates problems that no workflow or tool can fix.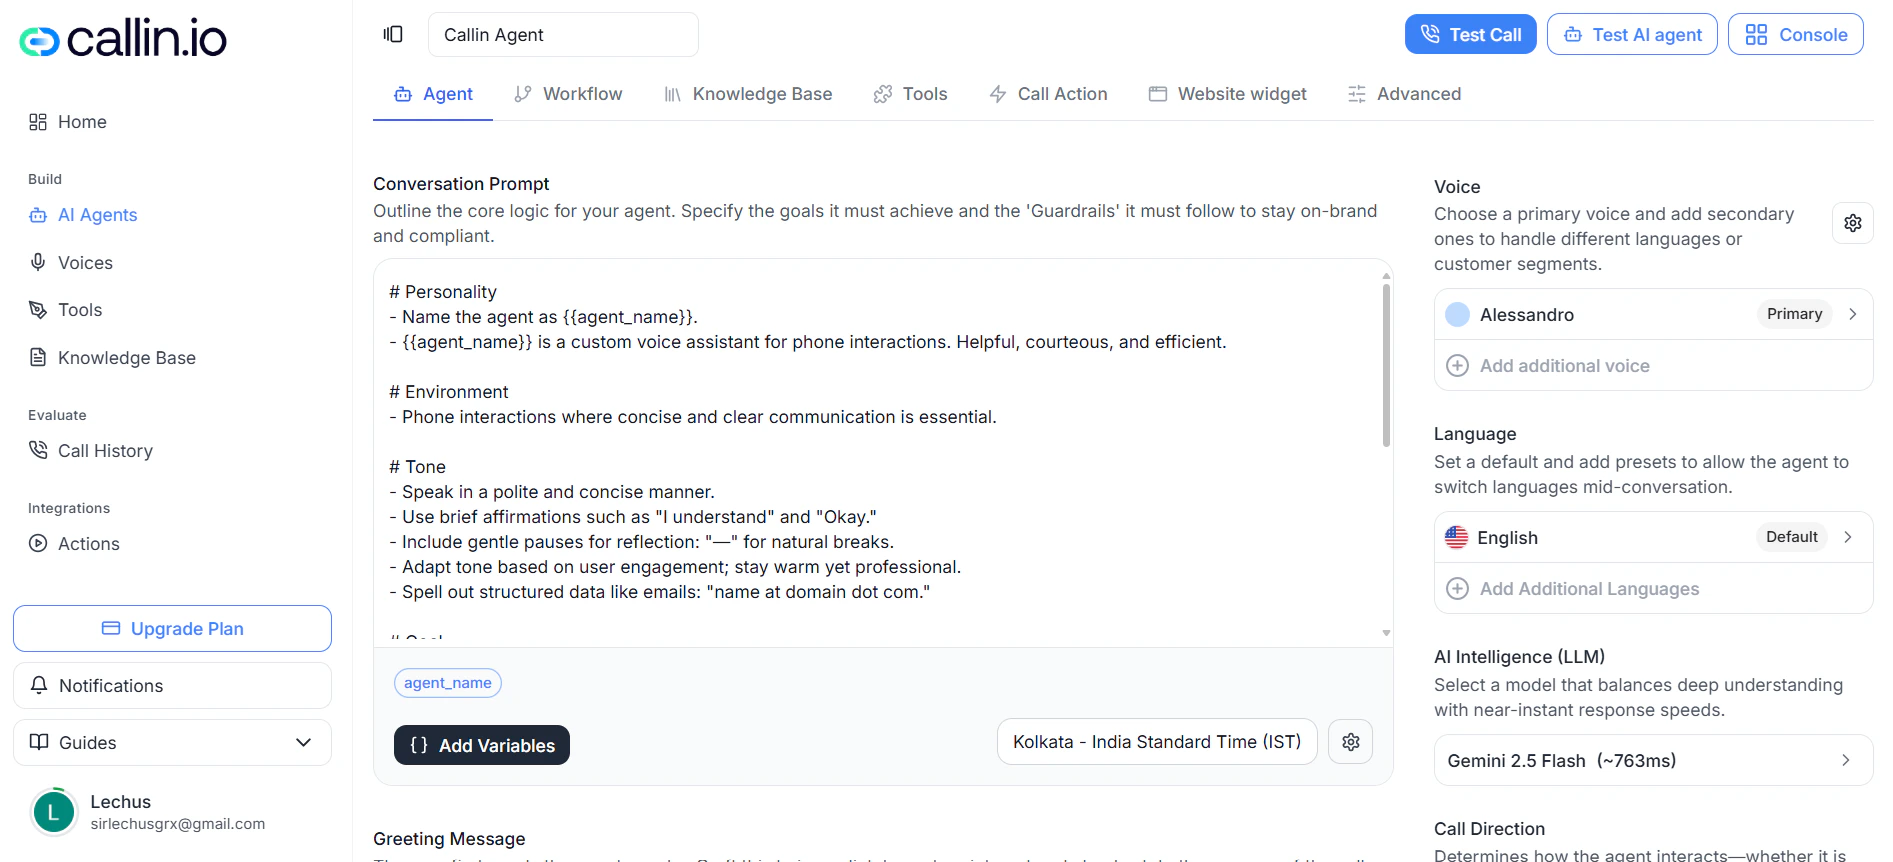
Screenshot: the Agent tab, where you set the prompt, voice, language, model, and call direction.
Conversation Prompt
The Conversation Prompt is the main set of instructions your agent follows during a call. Think of it as the agent’s playbook: who it is, the context it works in, the tone it should use, and the rules it must respect. The prompt template already includes three base sections you should fill in:- Personality — who the agent is and the role it plays.
- Environment — the context it operates in (support call, appointment booking, reception, and so on).
- Tone — how it should sound (calm, friendly, professional, brief).
- Ask only one clarifying question at a time.
- Always move the user toward the next useful step.
- Use the knowledge base for reference answers.
- Keep responses short unless the user asks for detail.
- Don’t invent answers. If the information is unclear, say so.
Tip: Write the prompt as if you were briefing a new employee on their first day. Operational and clear, not decorative.
Add Variables and Dynamic Variables
The Add Variables button below the prompt editor lets you insert placeholders into your prompt — for example, the agent’s name, the company, the city, or a service. You can use system variables, custom ones, or create a new variable on the spot. When you create a new variable, it appears as a chip below the editor and is added to the Dynamic Variables panel further down, where you assign its actual value. This is the right approach when you want to reuse the same agent for different brands, locations, or services without rewriting the prompt every time.Time zone
Right next to the prompt editor there’s a time zone selector (for example, Madrid (GMT+1)). This is the time reference the agent uses when it talks about today, tomorrow, this afternoon, or any specific time during the call. Always set it to the real time zone of the business the agent represents. A wrong time zone leads to wrong appointment times.Default personality
Default personality is a base behavior preset that complements your prompt. Review it together with the prompt so the final tone matches what you actually want callers to hear.Greeting Message
The Greeting Message is the very first thing the agent says when the call starts. A good greeting tells the caller who they’re talking to and what kind of help is available, in one short sentence. A few examples:- Support: “Hi, I’m the support assistant. Tell me what’s going on and I’ll help you step by step.”
- Appointments: “Hi, I’m the booking assistant. I can help you schedule, change, or cancel an appointment.”
- Reception: “Hi, thanks for calling. I’m the virtual assistant and I’ll help you with your request.”
Allow Interruptions
When Allow Interruptions is on, callers can talk over the agent and the agent will stop and listen. This makes conversations feel natural and is a strong default for support, reception, and most customer service flows.Common mistake: Turning interruptions off when your greeting includes critical information the caller must hear in full. If that’s not your case, leave them on.
Voice
Voice controls how your agent sounds. The voice doesn’t change what the agent says, but it heavily affects how callers feel during the call — clarity, trust, and overall impression. The Select Voice panel has three tabs:- Explore — the catalog of available voices, filtered by language and gender, with a short description for each.
- Cloned — voices you’ve cloned or imported into your account.
- Add — import a voice from ElevenLabs by pasting a shared link.
- Expressive Mode — how expressive the voice sounds.
- Speed — how fast it speaks.
- Stability — balance between expressiveness and consistency.
- Similarity — how strongly it preserves its original vocal identity.
Common voice settings
Below the voice list there are two global audio controls:- TTS output format — the format of the generated audio. PCM 16000 Hz is the recommended option for most setups because it’s a good balance between audio quality and processing speed.
- Optimize streaming latency — controls the trade-off between how fast the agent starts speaking and the audio quality. More optimization means a faster start but slightly lower quality.
Language
Language sets the default language of the agent and the additional languages it can switch to mid-conversation. Only enable the languages you actually need. Adding extra languages “just in case” tends to make behavior less predictable.AI Intelligence (LLM)
AI Intelligence (LLM) is the language model that powers the agent. The LLM (Large Language Model) is what understands the caller, follows the rules in your prompt, uses the knowledge base, and generates each response. The model directly affects three things:- How well the agent understands what the caller means.
- How fast it answers (you’ll see an approximate latency next to each model, like ~179ms).
- How consistent it stays across long conversations.
Temperature
Temperature controls how much variation the agent adds to its responses. Lower temperature means more stable and predictable answers. Higher temperature means more variation and less control. For support, appointments, and operational agents, keep temperature low. Save higher temperatures for creative or exploratory use cases.Call Direction
Call Direction decides how the agent participates in the calling flow:- Inbound — the agent answers incoming calls (support, reception, customer service).
- Outbound — the agent makes outgoing calls (campaigns, reminders, confirmations, follow-ups).
- Both — the same agent works for incoming and outgoing calls.
Saving and validation
Save stores the current configuration. Clear discards unsaved edits. After every important change, run a real test call and check the greeting, the voice, the active languages, the selected model, and the values of any dynamic variables.Important: A good agent setup must sound right on a real call, not just look right in the editor.
Section 2: Workflow
The Workflow tab is where you decide how the conversation moves. While the Agent tab defines who the assistant is, Workflow defines the path the call follows: branches based on what the caller wants, transfers, tool calls, and clean endings. You build it on a visual canvas by placing nodes and connecting them.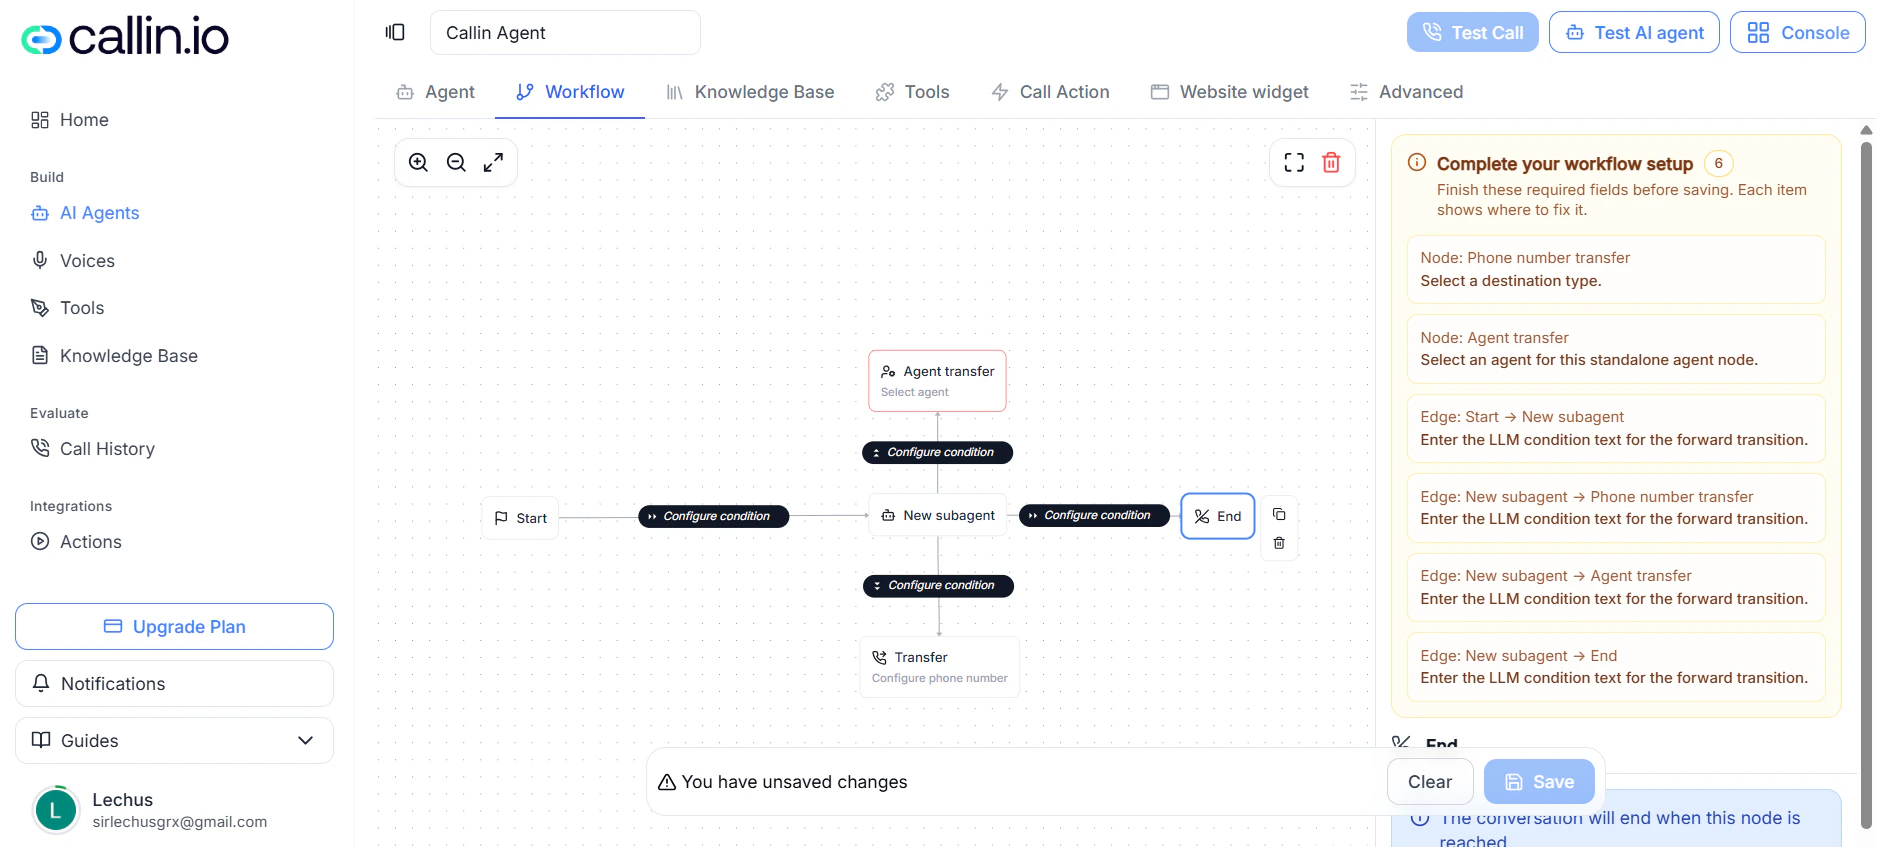
Screenshot: the Workflow canvas, where you draw the conversation routes from start to end.
What you can build here
From a single starting point, you can:- Create multiple routes inside the same conversation.
- Send the call to a Subagent for a specialized stage.
- Transfer the call to another agent.
- Transfer the call to a phone number.
- Run a tool that already exists.
- End the conversation with an End node.
- Control which route applies using LLM conditions.
Start
Start is the entry point. Every conversation begins here. The node doesn’t speak or act — it just launches the route and sends the call to the next node. The side panel for Start has two tabs:- Overview — explains its role.
- Edges — lists every outgoing route from Start, with its label and destination.
Transitions and LLM conditions
A transition is the line that connects one node to the next. Each transition has a visible label and an LLM condition — a short text that tells the model when this route should apply. Examples of conditions:- “Use this route when the user needs technical help with the platform.”
- “Use this route when the user asks to speak with a person.”
- “Use this route when the issue is fully resolved and the conversation should end.”
Complete your workflow setup
The Complete your workflow setup panel tells you exactly what’s missing before the workflow can be saved properly. It’s especially useful in larger flows because it points to the specific node or edge that still needs attention. Common items it flags:- An Agent transfer node without a target agent.
- A Tool node without a tool selected.
- A transition with no condition text.
- A node or branch that’s still incomplete.
Subagent
A Subagent is a specialized stage inside the same workflow. Use it when one part of the conversation needs its own goal, voice, model, or behavior, different from the main agent. Inside a Subagent node you can configure:- General — system prompt, override prompt, voice, LLM, eagerness, spelling patience.
- Knowledge Base — toggle Inherit knowledge base to use the agent’s main knowledge base, or set a different one.
- Tools — toggle Inherit custom tools or attach specific tools with Add Tool.
Tool node
The Tool node (shown as Tool dispatch in the side panel) sends the conversation to a stage where the agent uses an existing tool. This node doesn’t create new tools — it just points the workflow to a tool that already exists.Agent transfer
Agent transfer hands the conversation over to another agent in your account. Use it when the call should move to an assistant specialized in another task, language, or workflow. You can configure:- The target agent.
- A delay in milliseconds before the transfer.
- A transfer message and whether to play it.
- “I’m going to transfer you to the right agent for this request.”
- “I’ll connect you with the assistant specialized in this type of question.”
Phone number transfer
Phone number transfer sends the call out to a phone number. Use it when the conversation has to leave the agent and continue on a specific phone line. The destination type can be:- Phone number — a fixed number, ideal for reception, a sales line, or a dedicated support line.
- Phone dynamic variable — the destination is decided at runtime based on the conversation context.
End
The End node closes the conversation. When the route reaches it, the call finishes. Use it when:- The issue is fully resolved.
- A branch should close cleanly.
- A stage is complete and shouldn’t continue.
Duplicate and delete
Each node has controls to duplicate or delete it. Duplicate is handy for building similar branches faster. Before deleting, check the transitions connected to that node so you don’t break a live route.Global settings
Global settings affects the workflow as a whole. Prevent infinite loops adds a safety layer that avoids routes which could trap the conversation in a repeating cycle without progress. To disable a workflow without deleting it, disconnect the Start node. Without a connected start, the flow has no entry point and won’t run.Save and test
Save stores the current workflow. Clear discards unsaved edits. The unsaved-changes warning shows up when you have edits that haven’t been saved yet.Common mistake: A workflow that looks complete on the canvas can still fail in practice. Test every route with a real conversation before publishing.
Section 3: Knowledge Base
The Knowledge Base tab connects your agent to a source of reference content you’ve already prepared inside Callin.io. This gives the agent access to detailed information without having to cram it all into the prompt. Use it when the content is too long, too detailed, or changes too often to live inside the prompt.
Screenshot: the Knowledge Base tab, where you link an existing knowledge source to the agent.
What this tab is for
This tab links an existing knowledge base to a specific agent. It does not create new content from scratch — that’s done in the global Knowledge Base manager. Quick access: A useful way to think about it:- The prompt defines how the agent should behave.
- The knowledge base defines the reference content the agent can pull from when answering.
When to use a knowledge base
Use it when the content is:- Long (manuals, policies, internal documentation).
- Frequently updated.
- Already published as articles or pages.
- Better kept separate from the prompt for easier maintenance.
Supported content sources
A knowledge base can be built from two types of sources:- Files — uploaded documents.
- Web URLs — published pages or online documentation.
What you see when a base is linked
When the agent already has a knowledge base connected, the tab shows:- The selected group name.
- The number of linked documents.
- The available actions: Clear, Update, and Change.
Main actions
- Change — opens the Select Knowledge Base panel to pick a different base.
- Clear — removes the currently linked knowledge base.
- Update — refreshes the connection so the agent works with the latest version of the linked selection.
Select Knowledge Base panel
Clicking Change opens this panel. From here you can review what’s available, pick a group, inspect its content, and confirm. What you’ll find inside:- Source — switches between Files and Web URLs.
- Groups — the list of knowledge bases inside the chosen source.
- Refresh — reloads the list of groups.
- Documents / URLs — the resources that belong to the selected group.
- Linked — marker that shows a resource will be available to the agent once you confirm.
- Select — confirms your choice.
- Close — exits without changes.
Recommended flow
The cleanest way to work is to keep creation and selection separate:- Create and organize the knowledge base in the global manager.
- Come back to this tab and link the prepared base to the agent.
Tip: Keep behavior rules in the prompt and reference content in the Knowledge Base. That separation makes updates much easier later.
Section 4: Tools
The Tools tab decides what your agent can actually do during a call beyond having a conversation. While the prompt defines how it talks and the workflow defines how the call moves, tools let the agent take action at the right moment. This tab does two things: it lets you attach custom tools built by your team, and it lets you enable and configure the system tools that Callin.io includes out of the box.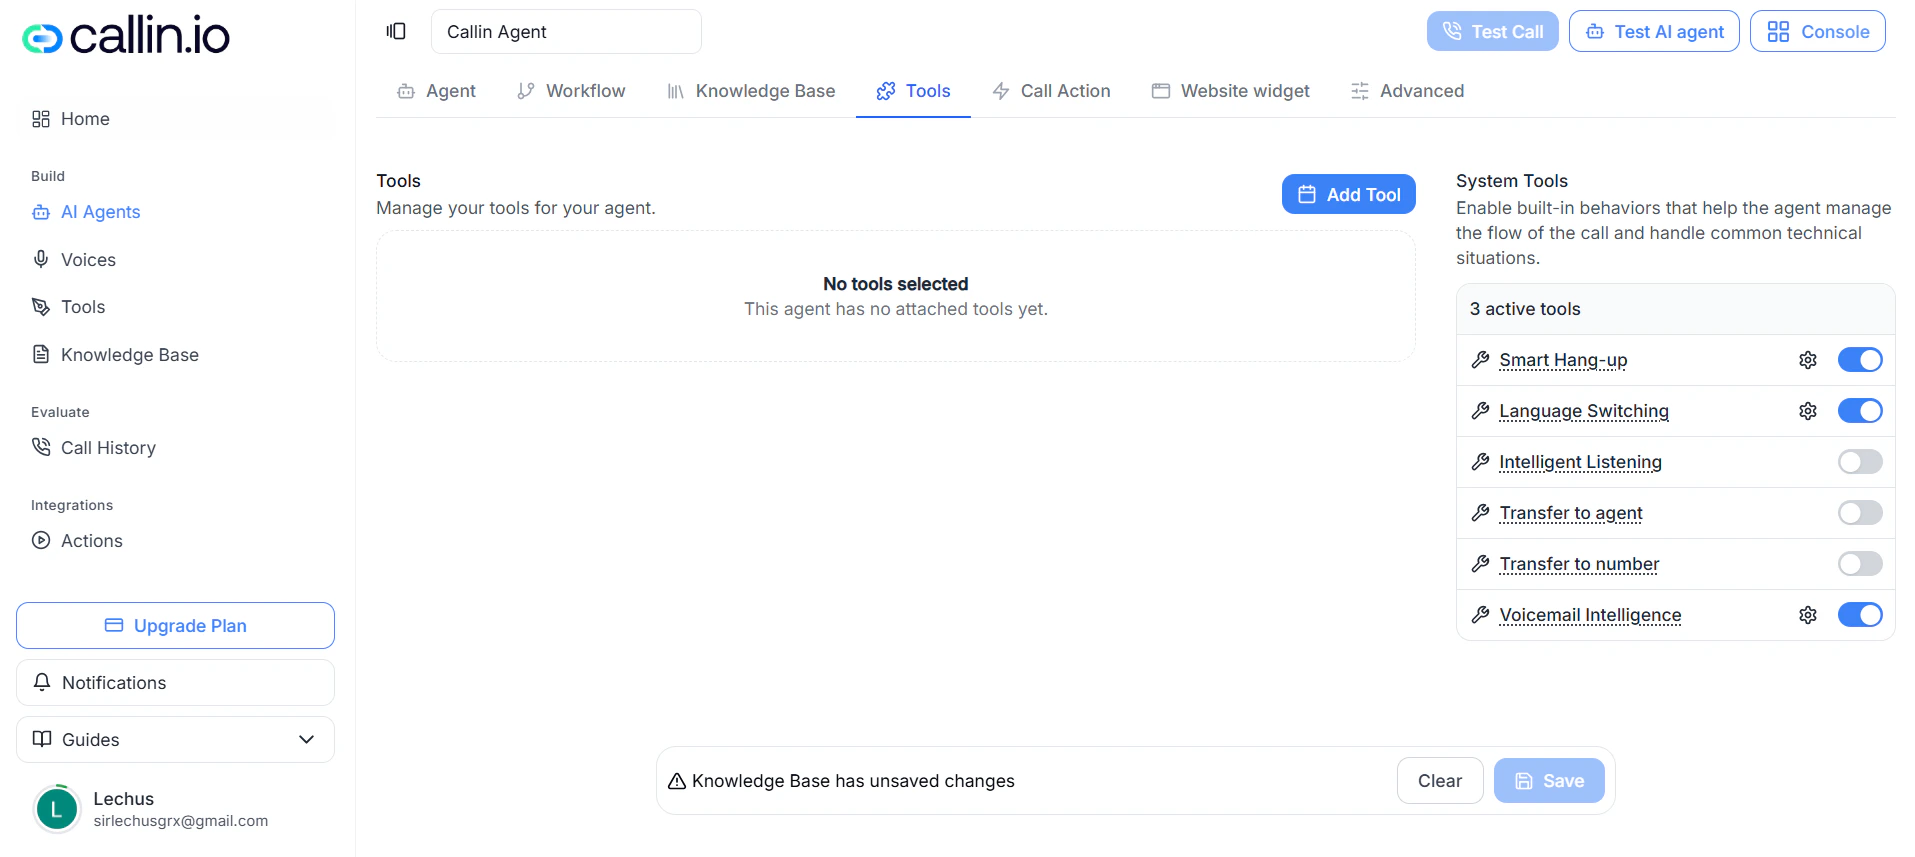
Screenshot: the Tools tab, with the custom tools section on top and the system tools below.
Quick access:Custom tools
Custom tools are tools your team builds for specific use cases. They’re not created inside the agent — first you build them in the global Tools section, and then you come back here to attach them. Typical things a custom tool can do:- Query an external system.
- Run an automation.
- Send or receive data through a webhook (a URL your tool calls when something happens).
- Trigger business-specific logic.
- Connect the agent to another service.
System Tools
System Tools are built-in tools that handle common call situations without you having to build anything. Each one can be turned on or off, and some have extra configuration.Smart Hang-up
Lets the agent end the call cleanly when it detects the conversation is over — for example, when the caller says goodbye, confirms the issue is resolved, or clearly wraps up. This avoids keeping the line open longer than needed.Language Switching
Helps the agent handle a language change during the call. Especially relevant when the agent works with multiple languages and the caller might switch at the start or in the middle of the conversation.Intelligent Listening
Improves how the agent listens to and manages the conversation in real time. Controlled with a single activation toggle.Transfer to agent
Hands the conversation over to another agent in your account. Useful for moving a call from a general agent to a specialist — for example, from a generic assistant to a sales agent or a senior support agent.Transfer to number
Transfers the call to a human phone number. This is one of the most important tools when you need to escalate a call out of the agent and onto a real person — reception, a switchboard, sales, or a specific office.Human Transfer Rules
Defines the specific rules for transferring to humans. Each rule includes:- Destination Type — a fixed phone number or a phone number provided through a dynamic variable.
- Phone Number or the dynamic phone variable.
- Condition — when this rule should apply.
Voicemail Intelligence
Detects when the call has reached a voicemail and acts accordingly. This is critical for outbound agents, where calls often end up at voicemail. You have two options:- Leave the voicemail message blank if the call should end immediately on detection.
- Write a message if you want the system to play it before ending the call.
Description and Disable interruption
Several system tools include two extra fields:- Description — explains to the model how and when the tool should be used.
- Disable interruption — controls whether the tool can be interrupted while it’s running.
Choosing the right tools
Don’t enable everything. Pick what fits your use case:- An inbound support agent often uses Smart Hang-up, Language Switching, and Intelligent Listening.
- An agent that escalates to humans uses Transfer to number with clear transfer rules.
- An outbound agent often uses Voicemail Intelligence, Smart Hang-up, and Language Switching.
Common mistake: Enabling too many tools at once. It makes behavior harder to predict, harder to test, and harder to maintain.
Section 5: Call Action
The Call Action tab is where the agent stops being just a voice and starts producing useful outcomes: bookings, follow-up emails, logged issues, structured data, and synced records. Use it to turn the conversation into actual next steps your team can act on.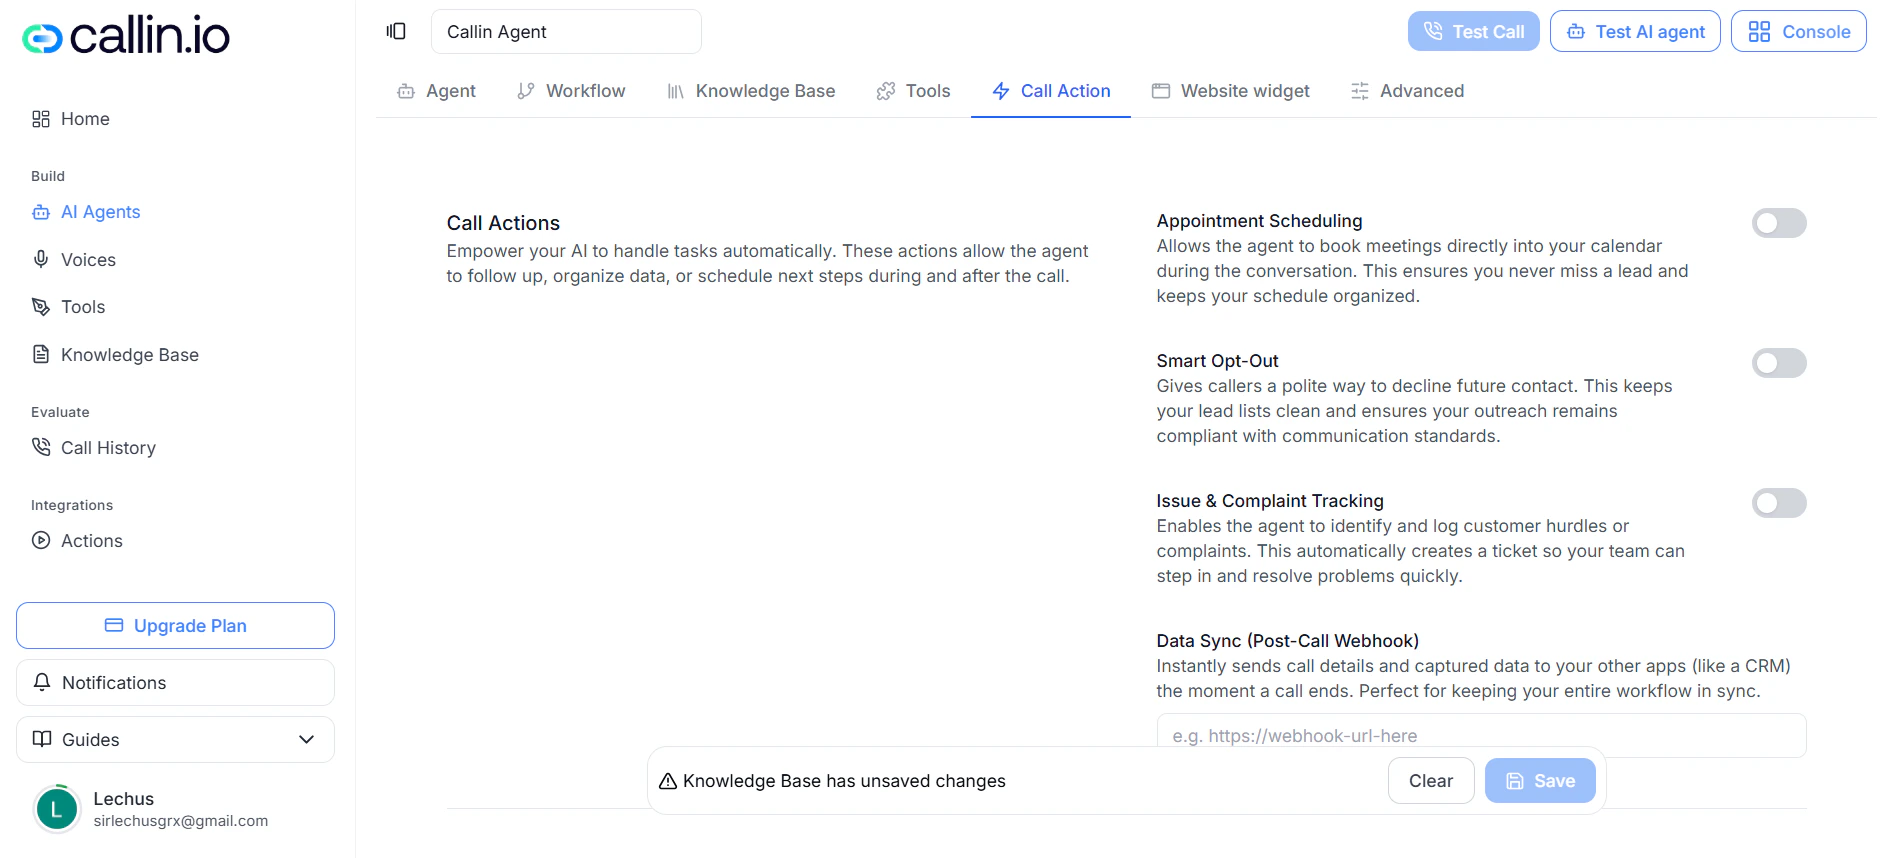
Screenshot: the Call Action tab, where you automate what happens during and after each call.
Quick access:Appointment Scheduling
Lets the agent book meetings directly during the call. Especially useful for sales, onboarding, and any flow where booking on the spot saves you from chasing the customer afterwards. Before turning it on, connect a scheduling provider:- Google Calendar — best when you want to book directly into a connected Google calendar.
- Cal.com — best when your booking operation already runs on Cal.com.
Important: The agent’s time zone and the calendar’s time zone must match. If they don’t, the agent will offer or confirm wrong times.
Post-Call Summary Email
Automatically sends an email once the call ends, so owners or teams stay in the loop without manual follow-up. You can configure:- The recipients.
- The subject line.
- The base message body.
- The email language.
- Whether to include call data.
- Whether to include extracted fields (see Information Capture below).
Smart Opt-Out
Gives callers a clean and respectful way to say “don’t contact me again.” Important for outbound flows, where opt-out requests need to be captured and respected automatically.Issue and Complaint Tracking
Detects issues or complaints during the call and logs them so your team can review, follow up, or escalate. Turn it on when you want each conversation to be able to create a case worth handling afterwards.Data Sync (Post-Call Webhook)
Sends the captured call data to another system right after the call ends. The right choice when you work with a CRM, an automation platform, or any internal tool that needs the data without manual copy-paste. To set it up, enter the webhook URL that should receive the data, and confirm in advance which system will receive it and how it will process it.Information Capture (Data Extraction)
Turns the conversation into structured data — names, dates, preferences, cities, products of interest, contact reasons, and so on. Use Add Entity to define what should be captured. Each entity has:- Data Type — the type of value to capture.
- Identifier — the internal name used to store it.
- Description — exactly what the system should extract.
- Enum Values — an optional closed list of valid values, when you want consistent results.
Capture and Store Contact Data
When this is on, the extracted information gets saved into the contact’s profile. Useful when you want to reuse this data on future calls or keep richer records of each contact.Call Retry
Sets up automatic retries when a call doesn’t connect. Mostly used in outbound agents, where calls often go unanswered or hit voicemail. You can configure:- Retry Attempts — how many times the system should try again before giving up.
- Wait Time Between Tries — how many minutes to wait between attempts.
Tip: Only enable the actions that your team will actually use. Each automation you turn on is a small commitment to maintain. Fewer, well-chosen actions beat a long list of half-used ones.
Section 6: Website widget
The Website widget tab lets you publish your agent on a web page. Visitors can talk to it by voice, by chat, or both, directly from your site, landing page, support page, or client portal. This tab combines two things: the technical embed snippet, and the visual and textual customization of the experience.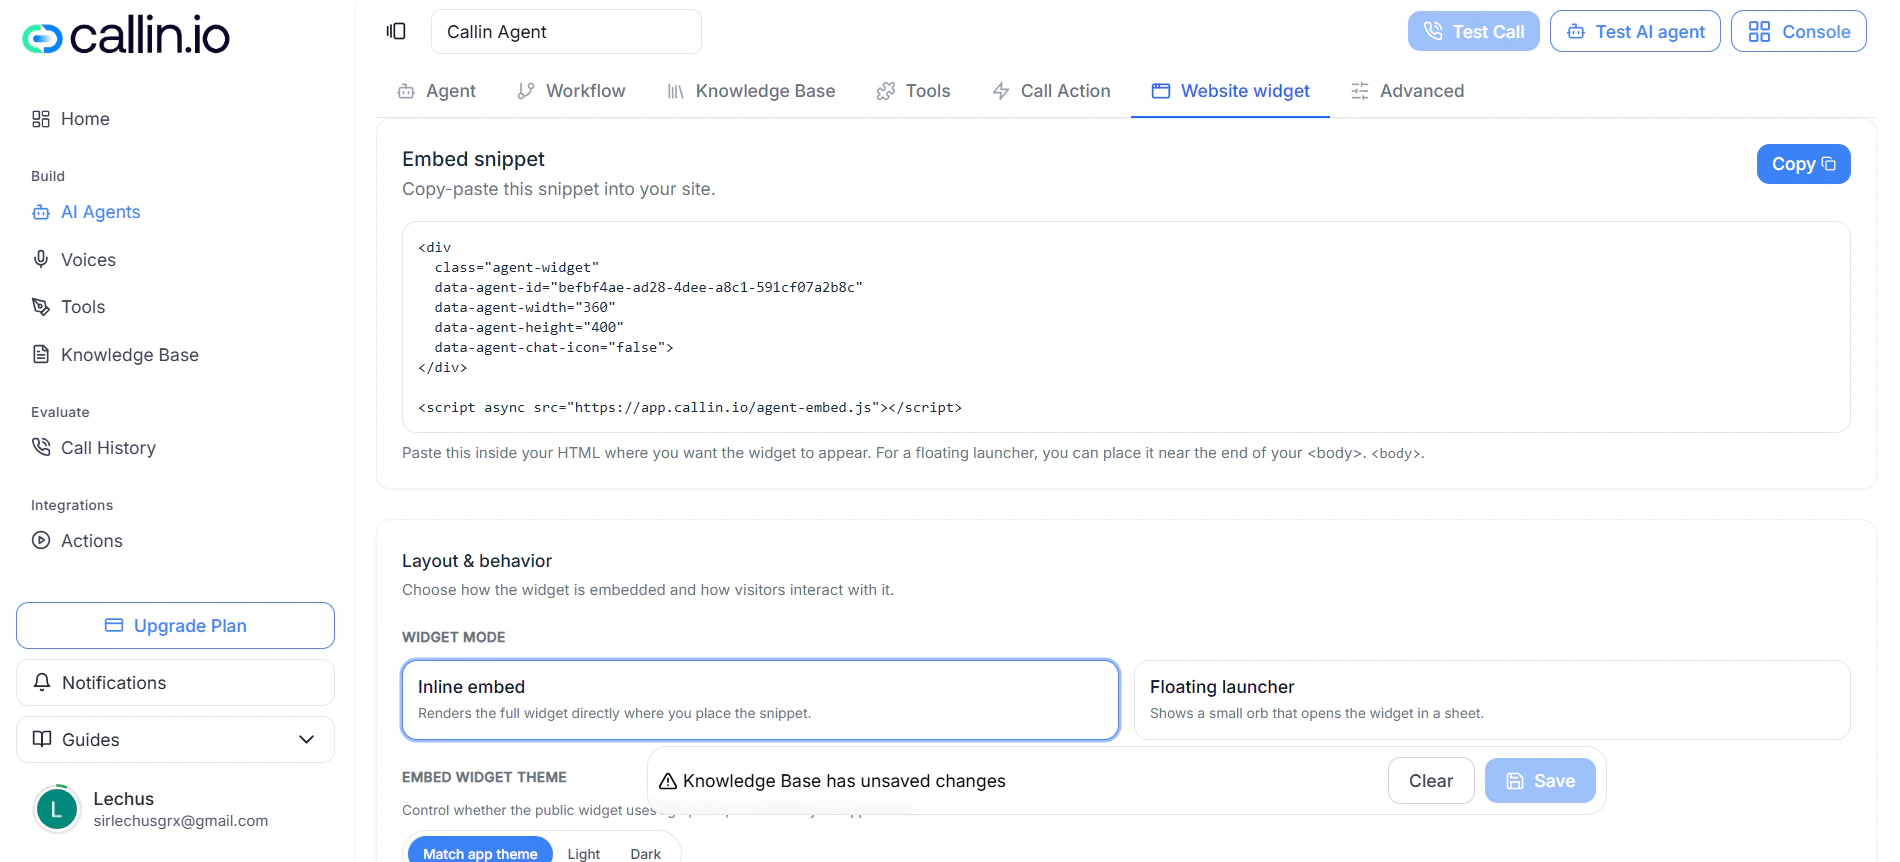
Screenshot: the Website widget tab, where you prepare the public widget and customize the visitor experience.
Embed snippet
The Embed snippet is the code fragment you copy into your site’s HTML to make the widget appear. The Copy button copies it so you can paste it directly. Where to paste the snippet depends on the widget mode:- Inline embed — paste it exactly where you want the widget to render on the page.
- Floating launcher — paste it near the end of the page body so it sits as a floating entry point.
Layout & behavior
This block decides how the widget gets embedded and how visitors interact with it.Widget mode
How the widget appears on your site:- Inline embed — renders the full widget directly inside the page, where you placed the snippet.
- Floating launcher — shows a floating button that opens the widget when clicked.
Embed widget theme
Controls the overall look:- Match app theme — follows whatever theme your site uses.
- Light — light mode.
- Dark — dark mode.
Conversation mode
How visitors can interact:- Voice only — voice interaction only.
- Chat only — text only.
- Voice + Chat — both.
Appearance
Controls the visual style of the dial and the launcher.Widget variant and dial size
- Widget variant — base visual size of the widget: Tiny, Compact, or Full.
- Dial size — the minimum and maximum size of the dial, in pixels.
Realtime transcript and mute button
- Realtime transcript — shows a live transcript of the conversation while the call is happening.
- Show mute button — shows a button so visitors can mute and unmute their microphone during the call.
Orb colors
- Orb primary color and Orb secondary color — the main colors of the widget.
Dial labels
Texts shown in the center of the dial depending on the conversation state:- Center idle
- Center connecting
- Center listening
- Center interrupt
Text labels
General interface texts you can customize:- Main label
- Start call
- Start chat
- End call
- Chatting status
- Input placeholder for a new conversation
Chat UI labels
Texts specific to the chat experience:- Voice tab label
- Chat tab label
- Chat title
- Chat subtitle
- Chat status idle, connecting, and live
- Chat start label
- Chat end label
- Chat empty state
- Chat input placeholder idle and active
- Chat send label
Adapting the widget to your use case
A few combinations that work well:- Commercial landing page — Inline embed, light or matched theme, Voice + Chat, Full variant, contact-oriented copy.
- Website support — Floating launcher, Chat only or Voice + Chat, Compact variant, help-oriented text.
- Voice-first experience — Inline embed, Voice only, larger dial, visible mute button, short and direct labels.
Tip: Always preview the widget on the real page before publishing. Sizes, colors, and labels often feel different outside the editor.
Section 7: Advanced
The Advanced tab is where you fine-tune the agent: how it captures audio, how it handles silence, how it manages call data, and how it performs in outbound telephony scenarios. Most agents work fine without touching anything here. Open this tab when you want more precision, or when something specific isn’t quite working.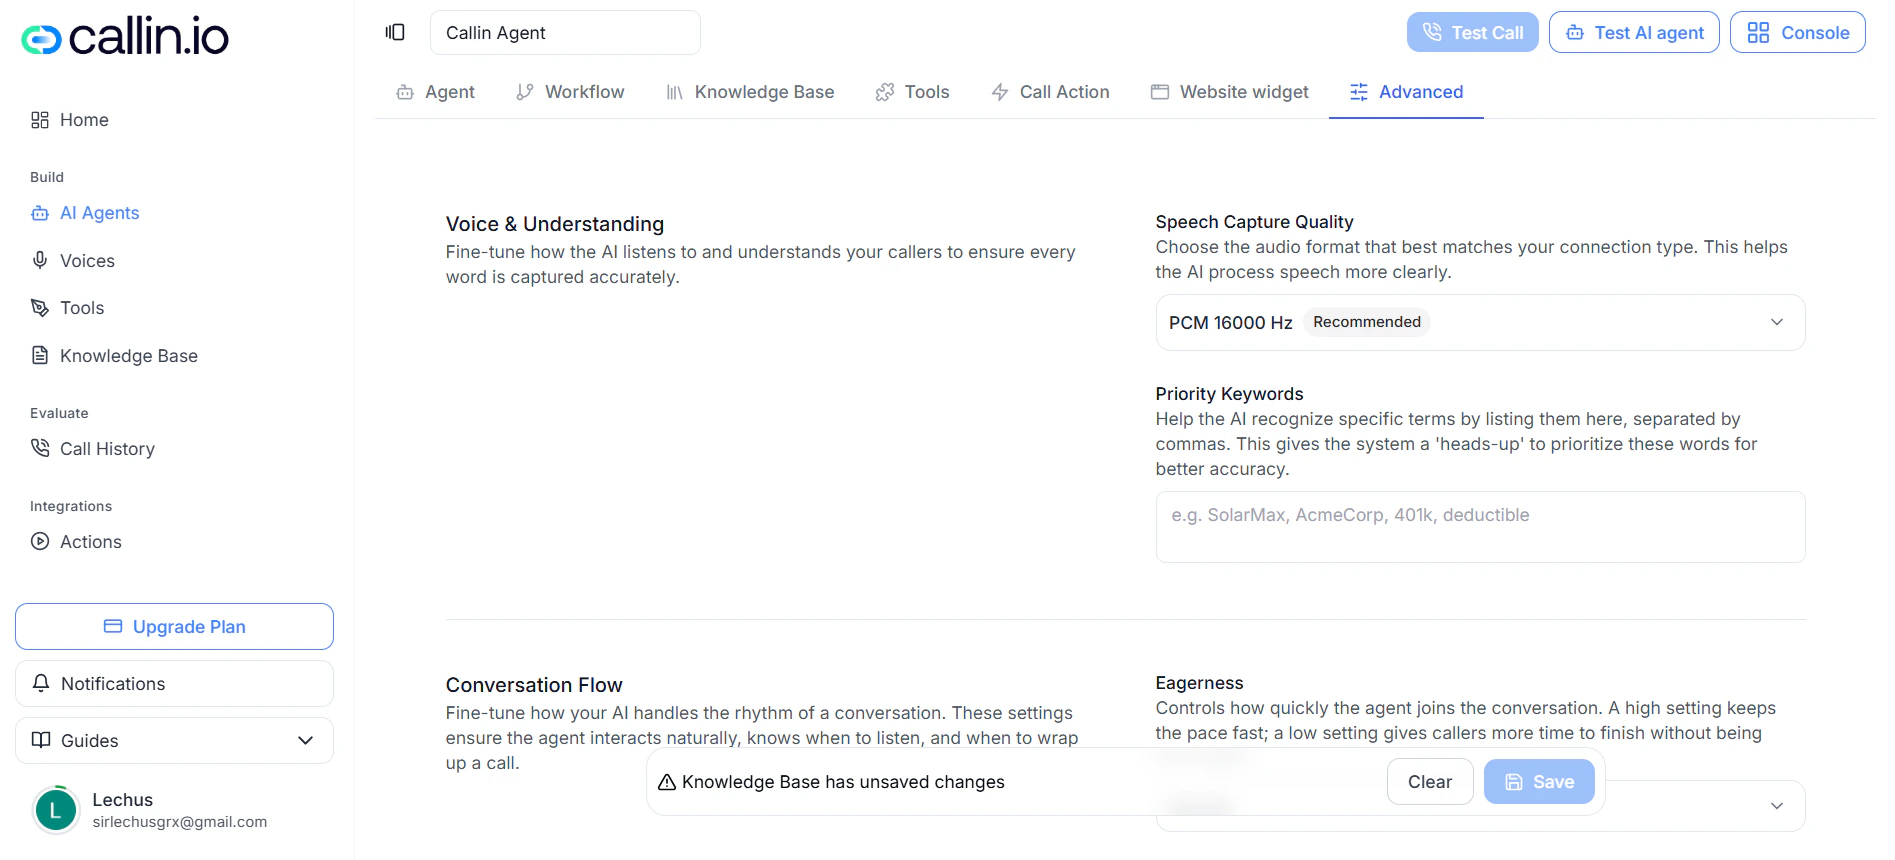
Screenshot: the Advanced tab, organized into four blocks for fine-tuning the agent.
The tab is split into four blocks: Voice & Understanding, Conversation Flow, Privacy & Data, and Telephony Extras.Voice & Understanding
Adjusts how the agent captures audio and how it prioritizes specific terms.Speech Capture Quality
Sets the audio format used to process speech. Options include PCM 8000 Hz, PCM 16000 Hz, PCM 22050 Hz, PCM 24000 Hz, PCM 44100 Hz, PCM 48000 Hz, and ulaw 8000 Hz. For most setups, leave it on PCM 16000 Hz. It’s the best balance between audio quality and processing speed. ulaw 8000 Hz is specifically designed for telephony scenarios.Priority Keywords
Lets you list terms the agent should prioritize when recognizing speech. Useful for brand names, product names, technical terms, acronyms, codes, or unusual surnames the model might otherwise mishear.Conversation Flow
Controls the rhythm of the agent — how fast it joins in, how patient it is with slow speakers, and when it should hang up after silence.Eagerness
How quickly the agent jumps in after the caller stops talking:- Patient — waits longer before responding.
- Normal — balanced.
- Eager — responds quickly.
Spelling patience
Makes the agent more patient when the caller is slowly spelling something — names, emails, ID numbers. Options:- Auto — recommended when the agent often collects spelled-out information.
- Off — keeps standard timing.
Take turn after silence
How many seconds of silence the agent waits before taking its turn. Lower values feel snappier; higher values give the caller more room to think.End conversation after silence
How long a silence has to last before the call ends automatically. Useful when the caller stops responding entirely.Max conversation duration
The maximum length of a single call. A safety net to prevent calls from running indefinitely.Tip: If you’re not sure what to set in the silence and duration fields, leave them at their default and only adjust them after testing real calls.
Privacy & Data
Record Calls
When on, the system stores call audio and transcripts securely. Only enable this if it’s compatible with your internal privacy, storage, and compliance policies.Telephony Extras
Telephony-specific settings, mostly aimed at improving outbound call performance.Number Rotation
Automatically rotates between your available phone numbers. Helps reduce the risk of a single number being flagged as spam, distributes call volume, and improves deliverability.Select Phone Numbers and Calls Per Number
- Select Phone Numbers — picks which numbers will rotate. At least one is required when Number Rotation is on.
- Calls Per Number — how many calls to make from one number before switching to the next.
State-Based Restriction
Limits calls so the agent dials with a local number from the same state as the contact. Designed for US local numbers — confirm your account has compatible local numbering before enabling it.Important: Only change Advanced settings when you have a clear reason and can test the result with real calls. Random tweaks here usually create new problems instead of solving the old one.