What the Knowledge Base is for
The Knowledge Base is where you store information that your AI agents can use during conversations—so they don’t have to rely only on the main prompt. Typical use cases:- Answering questions about your business (services, pricing, policies, hours).
- Guiding users through processes (refund steps, appointment prep, onboarding).
- Keeping responses consistent across multiple agents.
Tip: Think of the Knowledge Base as “approved reference material” your agent can pull from when a caller asks detailed questions.
How it connects to AI agents
You don’t add the content directly inside an agent. Instead, you:- Build your Knowledge Base content here (Files or Web URLs).
- Then, when editing an agent, you select the Knowledge Base group you want that agent to use.
Important: If you update a Knowledge Base group and want the changes to affect an existing agent, you may need to go back to the agent editor and click an Update action in the Knowledge Base section (this can vary depending on your account/plan).
Files Knowledge Base
The Files tab is for uploading documents your agent should learn from (for example: a PDF policy, a DOCX script, or a TXT FAQ). Files are organized into groups, so you can attach the right set of documents to the right agent.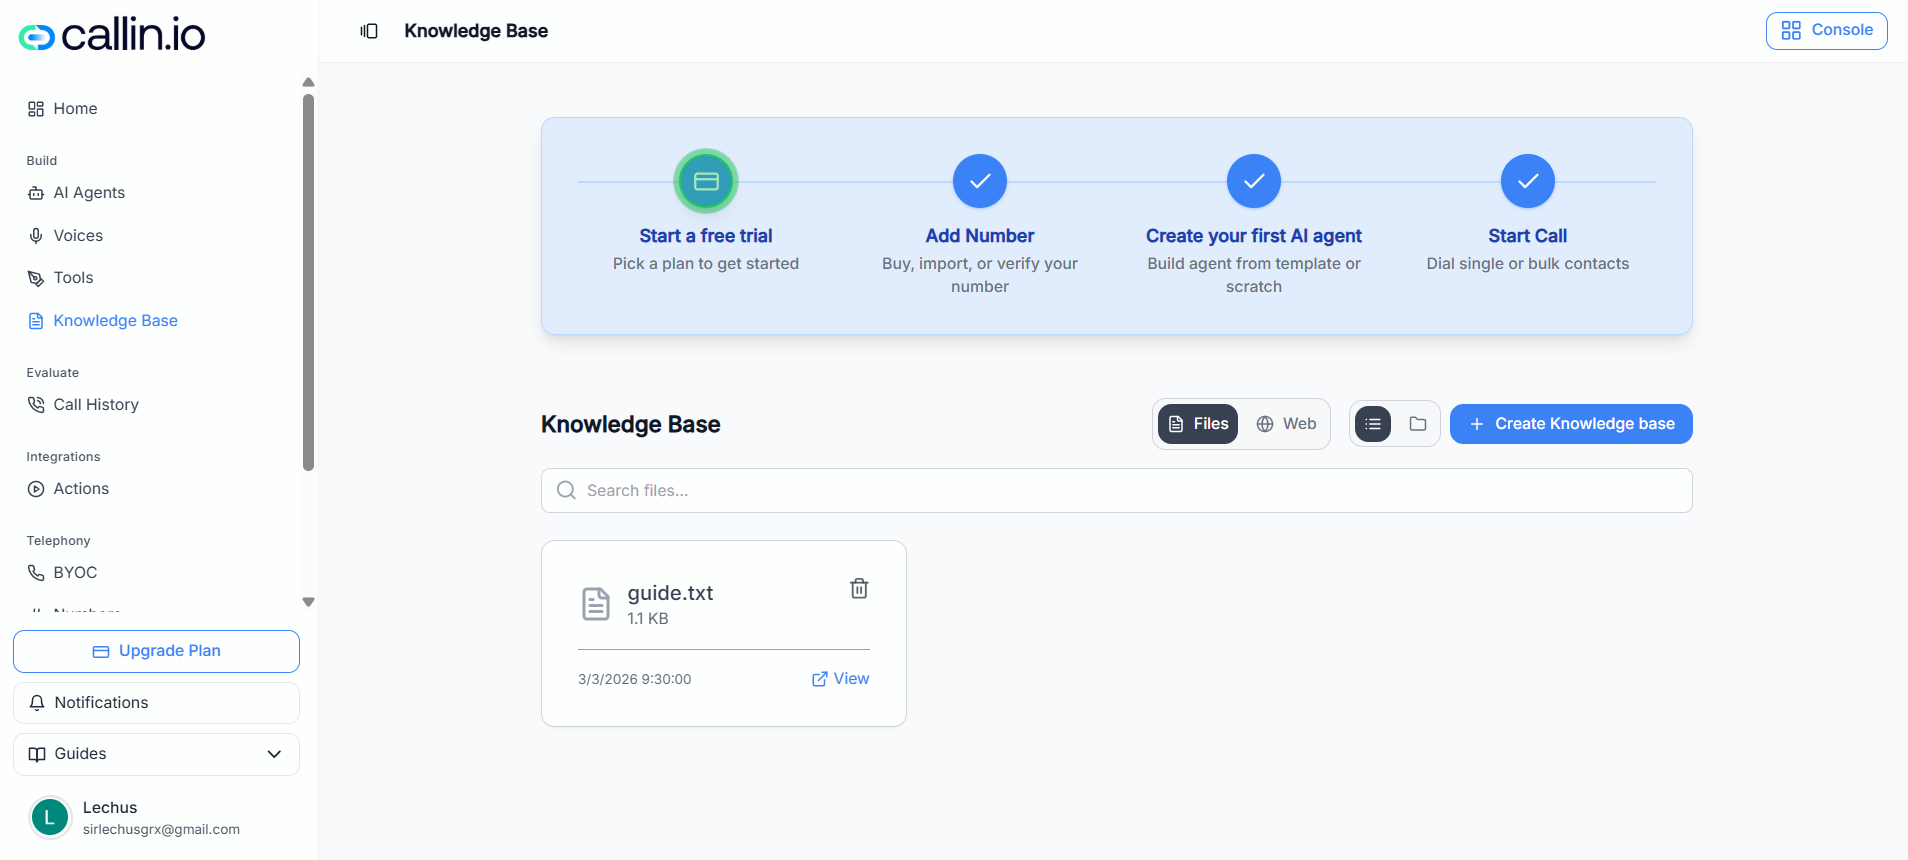
Screenshot: The Knowledge Base in Files mode, where you upload documents and organize them into groups.
Create a file group and upload documents
- Open the Files tab.
- Click Create Knowledge base.
- In the upload modal, enter a Group Name (required).
- Add your documents:
- Drag and drop files into the upload area, or
- Click Select Files to browse.
- Click Upload Files to finish.
- PDF, DOC, DOCX, TXT
- Max 5MB per file
Common mistake: Uploading multiple unrelated documents into one group. If you have different use cases (Sales vs. Support), create separate groups so you can attach the right knowledge to each agent.
Manage and update files in a group
After a group exists, you can open it to manage what’s inside:- Add more documents (for example, using Add New Files).
- See a list of Current Files already included.
- Remove files you no longer want the agent to reference.
Tip: Use clear group names like “Support Policies”, “Pricing & Plans”, or “Clinic Intake Script” so it’s easy to select the correct group later.
Web URLs Knowledge Base
The Web tab is for teaching your agent from web pages. You create a URL group, give it a title, and add one or more URLs. This is useful when your source of truth lives on your website (help center, docs, policy pages, landing pages).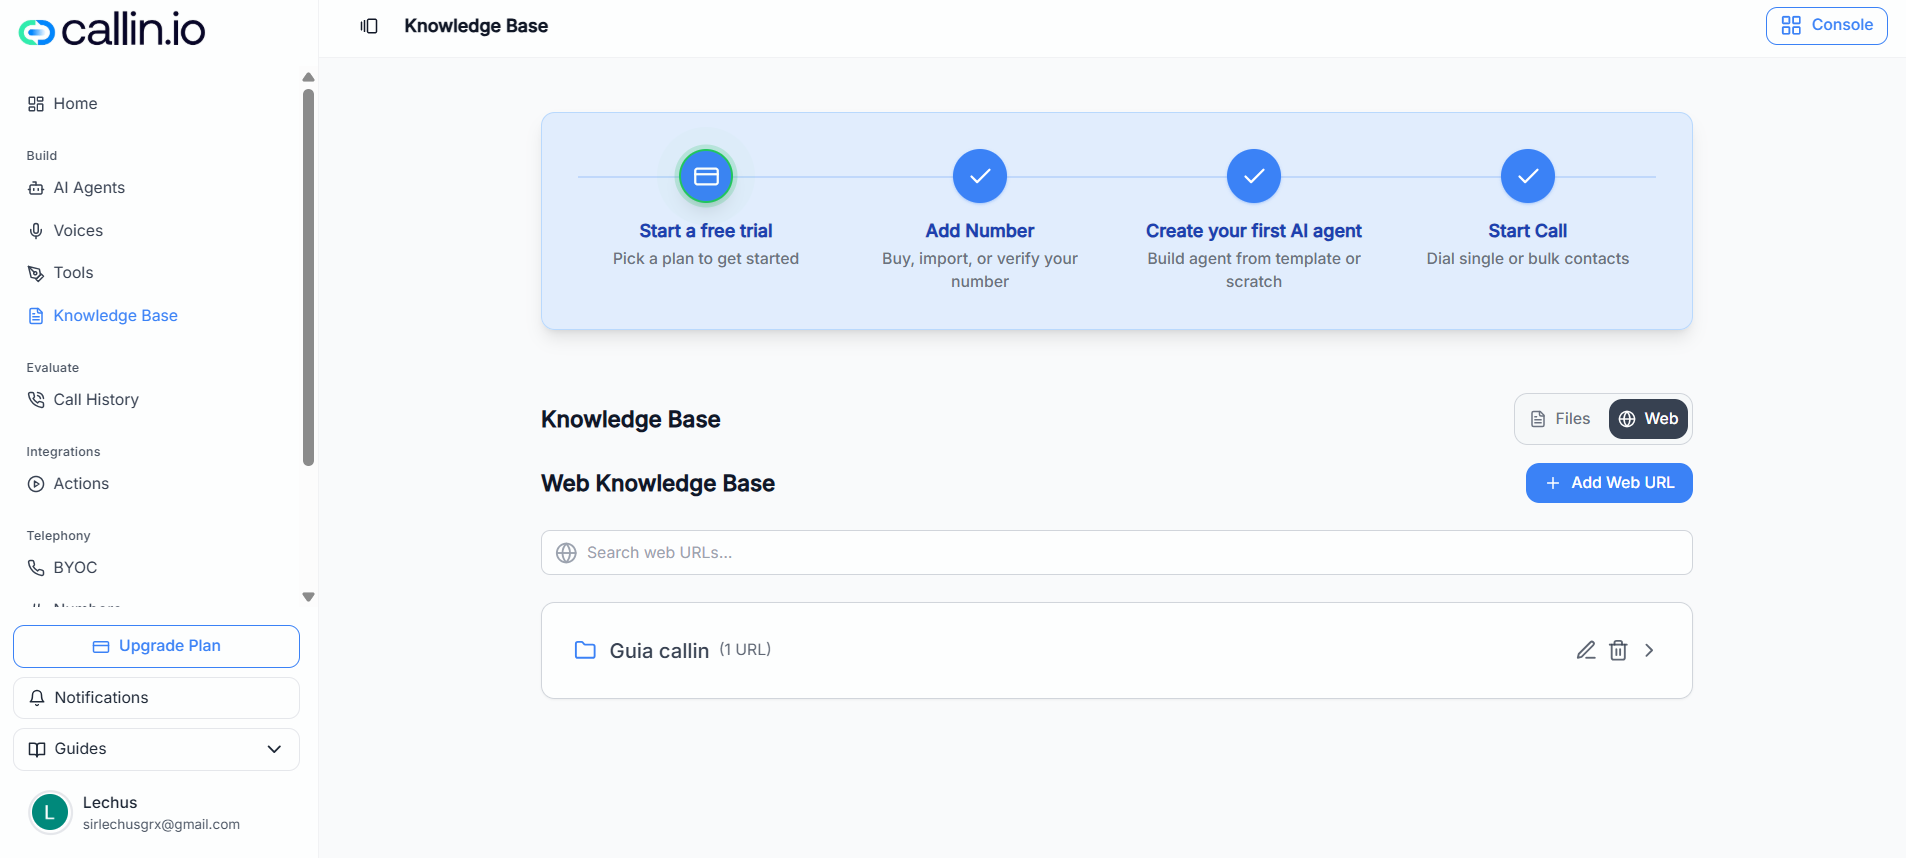
Screenshot: The Knowledge Base in Web mode, where you add and manage groups of website URLs.
Create a URL group
- Open the Web tab.
- Click Add Web URL.
- Fill in:
- Title (required): the name of the URL group (this title is used for all URLs in the group).
- URL #1: paste the first webpage link.
- (Optional) Click Add Another URL to include more pages.
- Click Add URL to save the group.
Tip: Keep URL groups focused. For example, make one group for “Pricing & Billing” URLs and a different group for “Refund Policy” URLs.
Edit or delete a URL group
Once a URL group is created, you can manage it from the list:- Edit the group title and URLs.
- Delete the group if you no longer need it.
- Open the group to see what’s included.
- Update the Title
- Add or remove individual URLs
- Click Save to apply changes
Important: If you change URLs and need an existing agent to use the updated content, you may need to re-open the agent editor and apply an Update in the Knowledge Base section (this can vary depending on your account/plan).
Select a Knowledge Base for an agent
After you’ve created your groups (Files or Web URLs), you attach one to an agent during agent editing.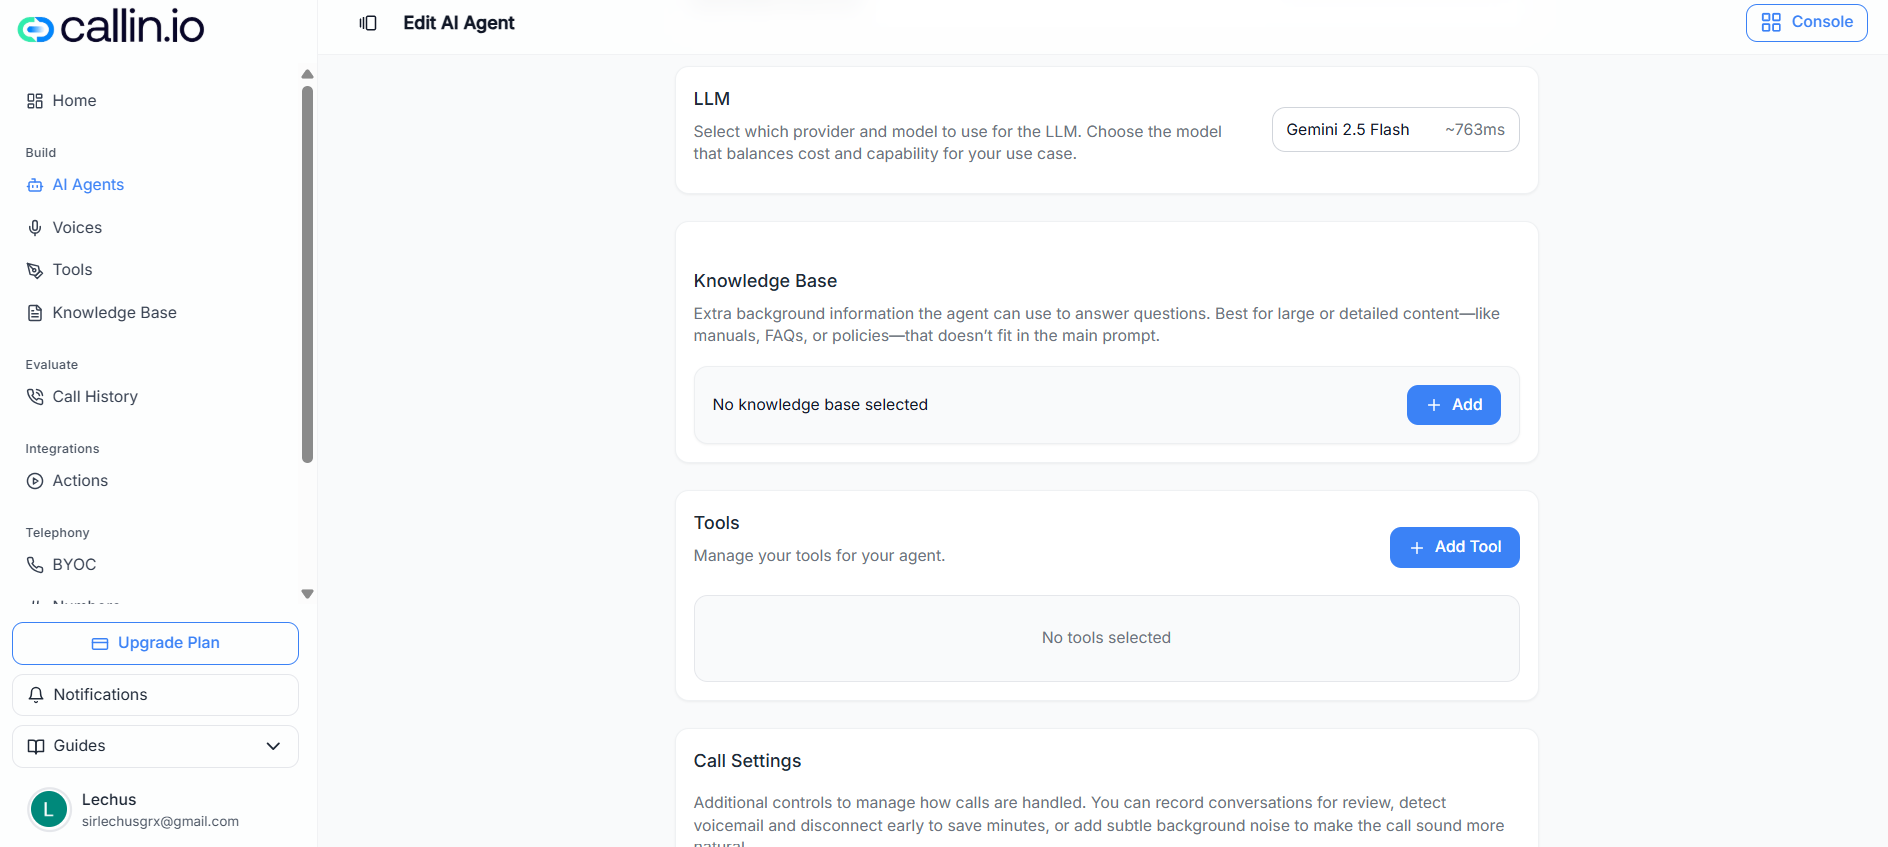
Screenshot: Selecting a Knowledge Base group while editing an AI agent (choose Files or Web URLs, then select a group).
Attach a group to an agent
- Go to AI Agents and open an agent to edit.
- Find the Knowledge Base section.
- Click Add.
- Choose the Source:
- Files, or
- Web URLs
- Select a Group (for example: “Support Policies” or “Company Website Docs”).
- Click Select to attach it to the agent.
Tip: If you have multiple agents with different roles, give each agent a different Knowledge Base group so they stay focused and don’t answer outside their scope.
Practical example
Let’s say you run a dental clinic and you have two agents:- Front Desk Agent (appointments, opening hours, directions)
- Billing Agent (pricing, invoices, insurance questions)
- Files group: “Clinic FAQs (TXT)” for quick answers and scripts
- Web URLs group: “Pricing & Insurance Pages” pointing to your public website pages
- The Front Desk Agent gets the FAQs group.
- The Billing Agent gets the Pricing & Insurance URLs group.